Added Monday, March 20th, 2017 @ 4:27 AM
This demo reel showcases some of my work from Halo 5: Guardians. While I wore many hats for this project, this video focuses on my work on performance.
Through asset optimization, memory management, streaming organization, and a lot of dedication and hard work, we were able to create a game that maintains an incredibly steady 60 FPS. Load times for streaming mid-mission take only a handful of frames for each load and go almost completely unnoticed (unless you’re reeeeeeeeeeally looking for them like me). Load times into/out of cinematics and missions can take a bit longer, up to a few seconds in some cases, but most transition nicely and in a timely manner with the fade-to-blacks that happen in these instances. That said, while some of these loads do take a few seconds, there are many that don’t drop a single frame!
Lastly, the video shows a quick demonstration of my streaming setups–something to which I paid very close attention. In the levels I worked on, I strived to ensure that any decisions to prevent players from going forward or backwards in the level progression was purely a design decision and not a technical limitation. On top of giving my designers the most freedom and the ultimate say in matters of progression, this also allows players (be it 1 – 4 players) to explore the maps at their leisure. If they miss something, they can backtrack through the level without problems, and if some players are faster than others, they can be vast distances apart before being automatically teleported to one another.
A couple of quick technical note: all of the footage in the video was captured with a capture card at 1080p and 60 fps with the exception of the splitscreen footage at the end which was captured in 720p at 30 fps via the Xbox One’s DVR. Also, all cinematics, either in-game or pre-rendered are 30 fps rather than 60.
I’d also like to give a shoutout to my fellow technical environment artists who worked on these levels before I joined the project–Brandon Nobbs, Brian May, and TJ Trently (all super rad dudes!).
Animated poster and music used with permission:
“Halo Canticles”, by Kazuma Jinnouchi
“Light is Green”, Kazuma Jinnouchi
Added Tuesday, May 20th, 2014 @ 3:12 PM
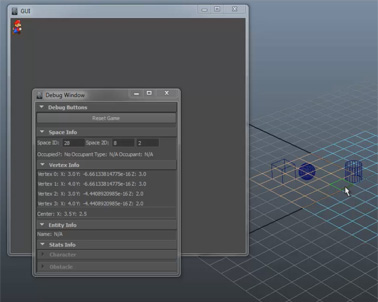
So here’s a fun little project I’m working on–Python Tactics (very tentative title). In short, it’s a turn-based tactics game that I’m developing in Python using Maya as an engine.
The Idea
Near the beginning of my internship at EA Tiburon, I knew that I would be working on various tools and scripts that would be written in Python and C#. At that time, I hadn’t written any Python for about a month or two, and I hadn’t used C# for a few years, so I wanted to start a little side project to help me get back into it. I thought maybe I could make chess or something grid-based, but I wasn’t sure what yet. A couple of days later, I randomly wondered if it was possible to use animated images (.gif’s or image sequences or something) in Maya’s GUI. That thought along with the grid idea lead me to decide on making a tactics game. I briefly thought about making the whole game in Maya’s GUI (displaying the game board, the characters, the animations, etc.), but then I thought it would be neat if I could use 3D models in the viewport in addition to using some GUI windows as the actual user interface.
At the same time, I was thinking how cool it would be if Maya, this robust tool for creating 3D models, could also be used as an engine to run a game. I always thought it was a bummer that artists created their assets in one program, where they may look and work perfectly, but then had to import them into an engine which might display and treat the assets differently than the program they were created in, requiring the artists to go back and fix the assets. I observed that this often led to artists not ever wanting to touch the engine because 1) they would often observe something was wrong, meaning they had to do more work and 2) they didn’t how why something was wrong because the engine wasn’t a program they were required to be familiar with. This obviously led to frustration. Who can blame them? It’s an awful feeling when you think you’re done with something only to find out that you’re not, especially when you don’t know how to actually finish your work. What if the 3D creation tool and the engine were one and the same? What if the artists could use all of their creation tools in the engine? They would already know how to fix things, and their assets would look and work exactly as expected–what you’d see is what you’d get! Cool stuff.
I had been using mostly Python at the time, so I decided to start writing in that and then port it over to C# later. My hope was this would give me some good practice in both languages as well as practice in writing code that was as language independent as possible.
So that’s where the idea came from–essentially just a combination of “Huh, I wonder if you can do this,” and “Hey, wouldn’t this be cool?”
Structuring the Code
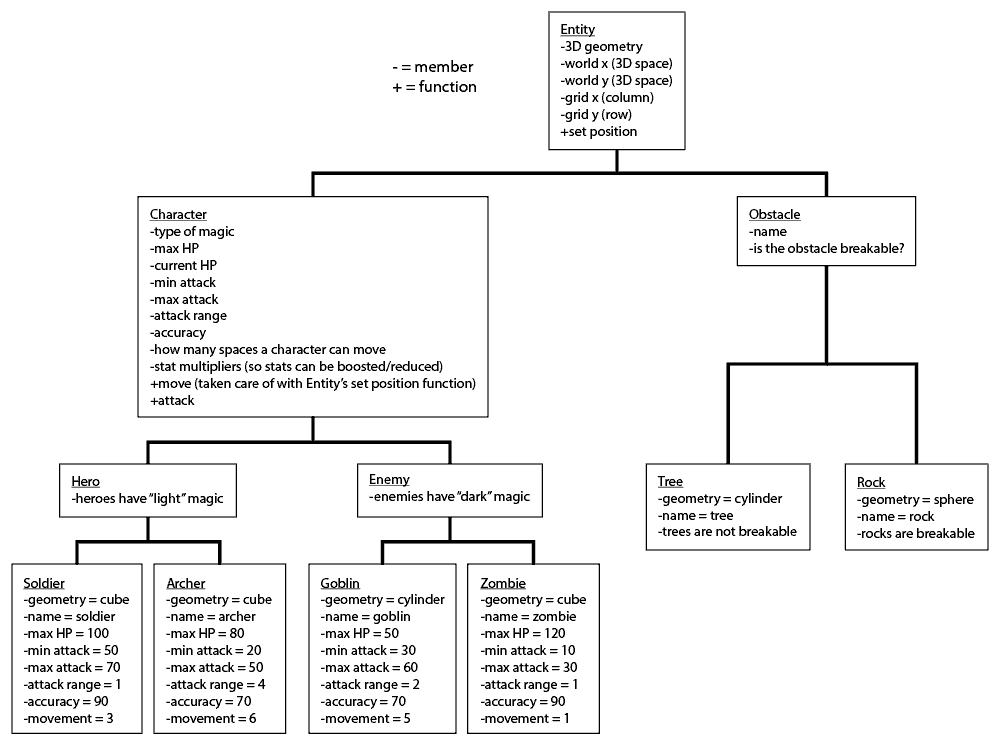
One thing I wanted to practice was dividing and structuring my code into different, appropriate groups. Mainly, I wanted to get some more practice effectively using classes and inheritance. The concepts were not at all new to me, but I had never really used classes together before, especially those that inherited from one another, and when I had, it was never really anything extensive. The first thing that immediately came to mind was characters. No wait! Entities… Yes… *wrings hands together* Entities would be perfect for this kind of thing. I came up with two types of entities–characters and obstacles. For both characters and obstacles, I would need to know where in 3D space (and on the grid) these would be. I would also need the ability to move both characters and obstacles. These attributes and functions would go in the Entity class, and both the Character and Obstacle classes would inherit from Entity. Each of those classes–Character and Obstacle–were broken down into more classes and those classes into yet more classes. In order to avoid becoming unnecessarily wordy, I’ll just use a diagram:
Classes lower in the diagram inherit from the higher ones they’re connected to.
So that’s the meat of my starting material. All of those classes are in an Entities module. I have a few other modules. EventController controls handling selections/mouse actions, starting the game, and controlling turns. GUIBuilder takes care of setting up, displaying, and editing the two GUI windows as the game goes on. TheGrid contains a GridSpaceVert class that holds information about a vertex, a GridSpace class that holds information about an individual square on the grid, and the TheGrid class that can create the game board/grid (comprised of many GridSpace instances), can clear the board, can resize the board, and can get/set information about the grid’s spaces and any entities on those spaces. Finally, I have a CubeBattle module that I’m using to import everything, create instances, and put the whole thing in motion.
These classes, while well organized (I think), are probably nowhere near done. However, so far I’ve been able to appropriately group every new piece of code I’ve thought of into one of the modules, so I’m pretty pleased with that. So far…
Problems and Obstacles I’ve Encountered
The first real obstacle I ran into was trying to get things to happen when I made a new selection. I knew that I needed, for example, the soldier cube to move to the space I clicked on. I knew how to move it, that was a simple matter of setting its position to the center of the square I clicked on, but how could I move it when I clicked on that square? I did quite a lot of research on the topic. For a while I thought that I would have to get into some C++(?) in order to anything event-based. I also found some information on Maya’s dragger context command and thought I might be able to use that. Thankfully, I eventually found my Holy Grail: script jobs. Script jobs run when certain events are triggered in Maya, and one just so happens to run whenever a new selection is made. Perfect! This was exactly what I needed! Whenever a new selection was made, I could run code based on what that selection was. In this case, I could detect if a square was selected in the character’s range, and, if it was during the character’s movement phase, move the geometry to that square.
I ran into a few more problems related to this (turning the script jobs off, using more than one script job for different tasks, etc.), but I eventually worked them all out. The next big problem was getting the Mario sprite in the GUI window to animate. The first thing I tried was simply setting the GUI’s image as a .gif. Unfortunately (but not surprisingly), this did not work. I also tried using a video as the GUI image’s source, but that too did not work (again not surprising). My next thought was that I would have to have different images and change the GUI image’s source over time, but how would I do that? I looked through the script jobs to see if there was one that could help me, but didn’t see one that could. They all run when an event is triggered, not simply over time in the background (or so I thought). I then tried mucking with moving the timeline and having that control the GUI image’s animation. I soon learned that I was unable to run code while the timeline was playing. Too bad… That would have been nice when the time came to implement 3D character animations. Oh well… I kept looking and looking, and I couldn’t find any answers or even helpful information. Finally, one day, I was looking back through the script jobs, and I noticed there was an “idle” event. I looked into it a bit and realized that this was exactly what I needed! When Maya wasn’t performing any other tasks, it was idle (duh :P), and it would call an idle event script job! With this, I was able to keep track of time, and switch the GUI image’s source to the next image in the sequence over time. Problem solved (b^_^)b
Future Plans
As you can see in the video, the game already runs at a basic level. Characters have turns in which they can move and attack, they can die, and the game can end. I’m in the process of deciding what exactly I want to implement next. I’m still not sure, but I do have some things I want to implement eventually (in no particular order):
- 3D characters and animations
- different elevations on the board
- a more robust GUI (which would be anything at this point :P)
- special attacks/moves for different character classes
- more character classes
- support for an infinite number of entities on the board (I think I already have this, but I haven’t really tested it yet)
So that’s where I am so far. I’ll keep updating as I get more done 😀
Added Sunday, March 9th, 2014 @ 10:17 PM
Ladies and gentlemen, I present to you my Effects Demo Reel for March 2014! All of the effects you see in this video were created by me for our Capstone game, Grapple.
If you’d like to see more detailed looks at the effects in the video, follow the links below:
- Animated Grapple Logo
- LOD Particle System
- Machina Death Particle (a very detailed look into how I made this effect)
- Lantern Thief Light Beam
- Animated Sprite Sheet Material
- Footprints
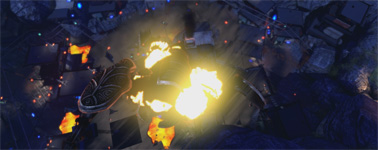
- Fire Bomb/Molten Metal
- Damage Overlay
- Lantern Particle Trail
Original music by Tom Mundy.
Added Tuesday, July 30th, 2013 @ 11:38 PM
Here are some effects that I created for Grapple over the course of a few weeks. The video includes:
- Animated Grapple Logo
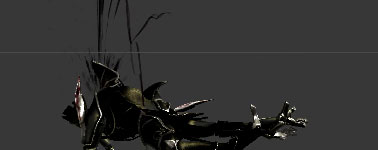
- Machina Death/Oil Spurt (a very detailed look into how I made this effect)
- Fire Bomb/Molten Metal
- Footprints
- Animated Sprite Sheet Material
The particles and shaders were created in UDK’s Cascade and material editors while the animated logo was rendered from a 3D scene in Maya and composited in After Effects.
Original music: Tom Mundy
Amina model: Nisa Martinez and Karen McCarthy
Original logo concept, building models, and Destrozar model: Karen McCarthy
Destrozar rig and animations: Robert Campbell
Added Friday, July 26th, 2013 @ 12:00 AM
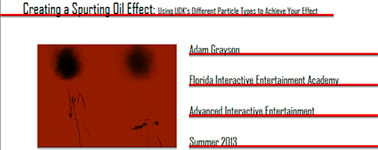
Late in our third semester at FIEA, the art students were expected to create a thesis based on something or some technique we wanted to or had learned while at FIEA. The teachers described it as an “innovation presentation.” Most of us used the opportunity to document and explain how we had overcome some crazy obstacle for our capstone games. Many of us chose to write it almost as a tutorial for future cohorts to use when they started their capstone games. Personally, I had been doing a lot of effects and particle work in UDK around that time, so I decided to describe one of the more challenging particles I had been creating–the Machina death/oil particle. I had gone through a ton of iteration on this particle, it had taken a long time to get it to look right, and it used some more advanced (I felt) particle work that I wished I had known when I first started using UDK, so it the perfect candidate to write about.
The paper goes over what my original task and goal was, some of my iteration, some (hopefully) helpful methods, different kinds of UDK particles, and, of course, the final product. You can read it here! If some of the videos don’t work in your browser, you can download the .pdf, and they should work.
Added Thursday, July 25th, 2013 @ 12:01 AM
One of the last effects we needed for the game was one for when the Destrozar furiously hits the ground during the final cutscene. Something that big hitting the ground that hard would make quite a lot of dirt fly around… Because I was working on five or six particles at the time, and we were running out of time, Anthony Fariello (on team Warp Derby) was kind enough to let us use his explosion particle (which are the explosions in the cutscene).
Added 7/25/13 @ 12:00 AM
This is a particle effect I made to use for when characters where landing on the ground after a jump. In the video, you can see it emit at Amina’s feet. Unfortunately, we did not have time to put it in the game. It’s “in game” in the video simply because I hooked a few things up in UDK, but were it to have actually been in the final build, the particles would have only appeared when characters landed on sand (not on metal or roofs, for example).
Added 7/18/13 @ 12:00 AM
Each year, FIEA gives its students plaques for their Capstone games. The designs for the plaque are created by members on the teams. While we ended up going for a different design, here are my concepts for the Grapple plaque. The one with Destrozar’s eye on the top half was designed to have the disc on the top of the plaque which no other past plaques had done (the disc has been on the bottom half of the design in the past), so I thought it might be interesting to try out a design that did that. All of the designs were put together and rendered with Maya.
While I did pose the characters and put the scenes together, I did not create the models.
Amina model: Nisa Martinez and Karen McCarthy
Destrozar and building models: Karen McCarthy
Machina and mountain model: James Diab
Amina, Destrozar, and Machina rig: Robert Campbell
Added 7/18/13 @ 12:00 AM
In the past, FIEA has given students discs and game boxes for their Capstone games. The disc and box designs were created by the members of each team. This year, however, they changed things up a bit. Instead of giving us physical copies of the games, we were instead to design a 42″x27″ poster for our games. We ended up going with a different design, but here is my work for a couple of concepts I made.
Amina model: Nisa Martinez and Karen McCarthy
Destrozar and building models: Karen McCarthy
Machina and mountain model: James Diab
Amina, Destrozar, and Machina rig: Robert Campbell
Added 7/10/13 @ 9:43 AM
For this piece, I set out do my best to get a RealFlow fluid mesh into UDK. The main enemy in Grapple has an ability to shoot a napalm “cannonball,” and my intention was to make it act like a liquid when it hit the ground–to have it splash and deform almost like a water droplet, only fire-y and dangerous. Immediately after, and most likely during the splash, fire particles would also start emitting from where the cannon hit, but the biggest shape, at least upon impact, would be this fireball exploding like a liquid.
Because the gorgeous looking meshes generated from RealFlow would have several thousands (very often more than 10,000) vertices and would move with very fine detail, I wanted to capture as much of that detail as I could in the most game-efficient way. I thought it would be neat and very doable (from a scripting standpoint) to just bake joints to every vertex, but that would be by no means a viable option for UDK. I then wondered if I could still track all of the vertices but instead do it through the object’s shader. Not only would it be very doable to move that many vertices in the shader, but it would likely be many times faster/more efficient while still giving me an incredible amount of detail to the object’s “animation.”
One of the challenges came in feeding the shader the complicated curves of the vertices’ animation. I thought about storing each data point (time, x-value, y-value, z-value) for each vertex in something like an .xml file, but feeding that amount of data in to the shader every draw call would put enormous stress on the system, especially with everything else happening on screen (and potentially this shader being applied to more than one on-screen object at once). What if I could instead create a function that represented the animation curves? The function would only have to be read once, and I could simply feed the shader in time in order to get the xyz’s different values. Moreover, after discussing the possibility with professors and fellow students, I decided that I could store these formulas in a texture to be read at run-time by the GPU which would be faster than reading an .xml file by the CPU (which would have to pass the data to the GPU anyway).
The shader is incomplete as of now, but the above video shows and explains the scripts and method behind driving the shader’s “animation.”
Added 7/3/13 @ 12:00 AM
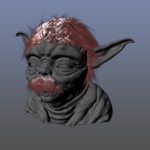
One day in modeling class, we went over Maya’s hair tools. THIS IS WHAT RESULTED!
The Yoda model is, funnily enough, by one of our tech art teachers, Barak Moshe from when he was at FIEA.


