Added Wednesday, May 29th, 2013 @ 12:00 AM
One of the things we wanted to achieve in Grapple was to have a very non-intrusive HUD with minimal, if any, UI (we did have to make some exceptions). With that said, we needed a way to show players where lantern thieves were in the environment.
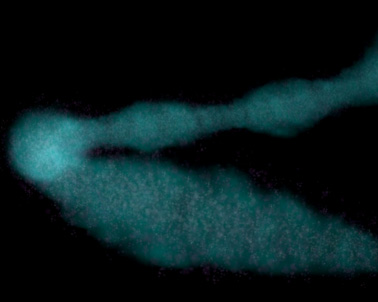
Within the game’s fiction, we had talked about the power lanterns giving off a kind of gaseous material or vapor of some sort. I took that idea and made a particle out of it. The idea was that the sparkly blue gas would rise into the air, high enough for the player to see, and the player could follow the trail down to find the lantern thief.
We ended up using another effect of mine for this purpose, and this particle was instead used for a particle trail in the ending cinematic.
Added Tuesday, May 28th, 2013 @ 12:00 AM
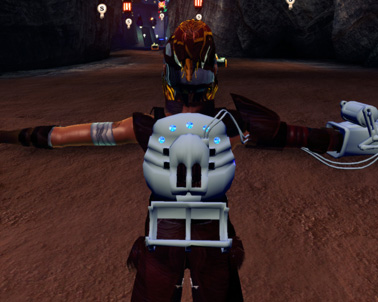
One of the things we wanted to do originally with Grapple was to have very little, if any, GUI during gameplay. We wanted to try to integrate the GUI into the game (think Dead Space). One of the obstacles was being able to show the player Amina’s health. How could we do that without a health bar?
One of the ideas we talked about was integrating her health into her backpack somehow. Perhaps we could have little lights or something light up/turn off to represent Amina’s health. We ended up instead using a bloody/dirty damage overlay to convey damage/health, but you can see some concepting I did on the backpack idea.
Amina model: Nisa Martinez and Karen McCarthy
Added Friday, May 24th, 2013 @ 12:00 AM
Nathan came up to me one day and asked me if I could help him to make a Grapple banner for his website. I took a couple of hours and came up with a few different designs, each with sharp edges and rounded edges of the image. I also made different sizes, so I could put them on the shared Perforce drive in case anyone else wanted to use them for their webpages. I used the logo design that Karen made, moved things around, and made a few minor tweaks to it to make the banners.
Added Friday, May 10th, 2013 @ 12:00 AM
Description:
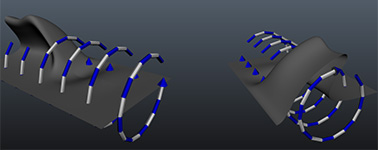
- Created a test wave effect for Grapple, post Vertical Slice, based on the technique for Surf’s Up‘s wave effect
- Used NURBS curves and blendshapes to create the motion of the wave(s), then created a rig to animate the wave(s)
- Test to see if modeled waves would be possible (and efficient enough) to use in the game
Added Monday, April 29th, 2013 @ 11:47 AM
Class:
PIE II – Art
Assignment:
Create a piece for your portfolio that can be used in your Capstone game.
Description:
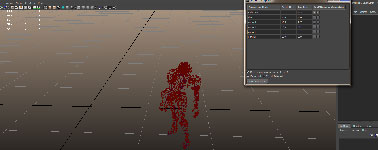
This script allows users to export multiple .fbx files from one Maya scene at the push of a button. It is meant for exporting animations, though it could conceivably be used for other purposes.
The script allows the user to specify ranges of key frames that should be exported as separate animations. In addition, each animation can be given a unique name that will act as the .fbx’s file name. Animations and their ranges and be added indefinitely to the list as well as removed from the list. The user can also specify whether to export all or export selected as well as whether or not the exported animations should be moved to frame 1 or keep their original key frame position. For example, if an animation was exported from frames 101-200 and the “Move animations to start at frame 1” button was checked, the newly created .fbx’s animation will go from frames 1-100 (if the checkbox wasn’t checked, the .fbx’s animation would still be from frames 101-200).
Added Thursday, April 25th, 2013 @ 12:00 AM
Class:
Tech Art
Assignment:
Create a piece in the field of tech art that can be used in your Capstone game. This will be your first tech art portfolio piece.
Backstory:
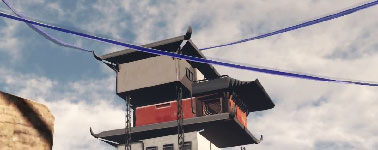
One of the problems I’ve been worried about in my Capstone game, Grapple, is that we plan on having a ton of ropes/wires crisscrossing from building to building. These ropes/wires will be strewn throughout the level. Ideally, they will be different sizes depending on the gaps they are traversing. Needless to say, that’s a lot of individual assets to make and place in the level.
Originally, before Vertical Slice, we had just one wire that we would duplicate and place around the level. That quickly grew tiresome and inefficient. Not only could we not resize the wire non-uniformly (if we wanted it longer, it also had to become thicker…) without breaking, but it also took forever to duplicate the wire once, place it (translate, and harder, rotate it), then repeat over and over.
When one of the producers informed me of this hassle, I made a script that was able create differently sized ropes in Maya at the push of a button. The script allows the user to specify the size (length, width, and depth) of the wire as well as the number of flags that would hang from the wire. It also assured that the wires’ pivots were on their very edge, so placing the wires in the correct rotation in the level became much easier.
This solution worked well enough for Vertical Slice, but the whole process was still dreadfully inefficient. While UDK does have a measurement tool that we could use to determine the lengths of wire needed, placement of the wires in the level as well as the process needed to turn the meshes into cloth once in UDK still took way too long.
Idea:
When we were told to create a tech art piece that could be used for our Capstones, this was the first thing that came to mind. I had a good starting point with what I had done pre-Vertical Slice, but it still needed some serious work to make it be really useful!
The project I proposed would be an extension of my original rope generator script. The main idea was that it would allow users (most likely level designers) to “draw” wires directly in the level from point A to point B. It would also set up the ropes to be seen as cloth (or some kind of physics-driven asset) in UDK. Essentially, it would pipeline the wire process to be able to create and place the wires as quickly and efficiently as possible.
Troubles:
Unfortunately, after doing a tremendous amount of research, I concluded that making a plugin for UDK would not be possible, so I decided to do the bulk of the pipelining process in Maya. The creation and placement would be done in Maya while setting the skeletal meshes up to work as cloth would be done in UDK.
During the development of the tool, I was introduced to Apex cloth. I thought that perhaps this could be an option to set up the wires in Maya to automatically work as physics assets once imported into UDK (rather than having to manually go through each asset individually and enable cloth physics). I’m not completely convinced this still isn’t an option, but the programmer who’s working on the wires and I tried many different methods to get Apex cloth to work for what we need, but we haven’t been able to get it quite right yet…
The trouble is that we need the wires to stretch when Amina, our game’s main character, grapples to them. When her grapple attaches to the wire, it needs to be pulled toward her, and then as she swings off of it, the wire needs to bounce back to its original position (imagine pulling on a rubber band then letting go). In order to move the wire while Amina’s attached to it, we’ve been manually moving the wire’s joints to simulate it reacting to her weight. After she’s let go of it, we let the physics take back over the wire’s movement. However, when we try to move the joints of an Apex cloth asset, the mesh either becomes distorted or not distorted enough. What I mean by the latter is that the mesh doesn’t follow the joints’ positions exactly; it seems to average their positions and make a smooth curve between them. So if one joint is say, 1000 units (which is a lot) away from all of the rest of the joints, you’re hardly going to notice.
Another method we tried was to create physics assets from the skeletal meshes once they were imported into UDK. The trouble we ran into there is that the collision boxes that are automatically created when you make the physics assets were never the right size. Unfortunately, the only way we could find to resize the collision boxes to fit the mesh was to resize each one by hand. Meaning, we had to click on the collision box and use the scale gizmo (which, in the PhAT editor, is even skinnier and harder to click than normal) in order to size it properly. While there are numbers that display the size of the collision boxes, they are, for some ungodly reason, uneditable. They change when you scale the box with the gizmo, but they’re read-only. We did eventually find an option to copy and paste the properties (i.e. the scale) of one box to another, but we still had to manually resize one box, then click on each other box and paste the properties. If that wasn’t enough, we had to follow this process for each and every individual wire asset.
Tool Description:
So with that all said, here’s how the pipeline works as of now. We export portions of the level from UDK and import them into Maya (exporting the entire level at once would make Maya explode!) and then import those chunks into Maya. Once in Maya, we create linear NURBS curves that will be used as wires. Only two points are needed for each rope–the beginning and the end. Once the curves have been placed, the script is run. It gives the user several options for the wires such as their thickness, and the number of subdivisions per wire. The user can choose to apply these settings to all curves in the scene or just those selected. The user can also choose to use these settings to overwrite wires that have already been created (by default, the script only affects curves that have no wire applied to them). Lastly, the user can enter an indefinite number of “length ranges” for certain settings to be applied to. For example, wires between a length of 5 and 10 units could have 3 joints while wires between a length of 15 and 27 units could have 16 joints. There is a “Calculate Length” button to help determine these ranges. When pressed, the button will print out both the names and lengths of all/selected curves (depending on the “Use all curves”/”Use selected curves” radio buttons up top). Lastly, the “Export” button will export all or only selected (again dependent on the radio buttons) wires as an .fbx. This .fbx can then be imported back into UDK.
In terms of positioning, all that’s needed inside UDK is to set the wires’ positions to (0,0,0); they’re correct positioning is carried over from Maya.
In terms of importing them to be automatically seen as physics assets, there’s still a bit more work. However, this work will be determined by the direction we choose to follow in UDK. All of our options require skeletal meshes with specific weighting which has already been done. So regardless of the choice, the wires are set up and ready to go!
Credits:
Building models and textures by Karen McCarthy
Added 4/8/13 @ 12:00 AM
Class:
PIE 2 Art- Animation
Assignment:
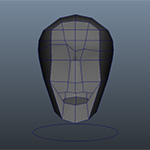
Build a low res face model with blend shapes & Stop Staring style rig & script.
- Account for basic visimes.
- Account for some emotion!
- Account for some sort of isolated left and right controls.
- Animate it! A simple phrase will do.
Submit the following:
- Maya file.
- Autorig script.
- Maya file with animation. (include Audio file)
Description:
This was a fun assignment! I was surprised (and pleased) in the end at how much emotion I could pull out of such a basic face. While the assignment only called for a small number of blend shapes, the face I modeled was basic enough that I could create a bunch of blend shapes to account for phonemes, visimes, and emotions (in this case it wasn’t full emotions, but rather moving different parts of the face that could be combined to form emotions). Plus, I figured that the more options I had to transform the face, the better I could make it look in the animation. I chose to use an infamous snippet from The Legend of Zelda TV series for my audio.
For the script part of the assignment, I mostly reused a script I had made for my tech art class. There were a few things I needed to change (mostly create support for automatically connecting blend shapes), but most of the work was already done. The script brings the face model, the skeleton, the NURBS controllers, and the transformed models (to-be blend shapes) into one scene, connects the skeleton to the face, applies skinning weights, connects the blend shapes to the face, and connects the controllers to the skeleton/blend shapes. You can take a look at the scripts and .xml files here.
Added 3/21/13 @ 12:00 AM
Class:
Technical Art
Assignment:
- Make a tool in Maya that will use XML data to create either a full character or environment
- Character
- Must include the following:
- Character Mesh
- Skin Weights
- Shaders(can NOT come inherently from the mesh source!)
- Environment
- Must include the following:
- A varied scene (must be
a scene filled out enough to look like something that would be found in a game. Don’t go minimal) - All shaders assigned to their appropriate meshes. These shaders CAN NOT come inherently from the mesh source.
- All scene lighting
- Tool MUST have error handling
General design and function of the tool is up to you, but keep in mind that the design and functionality of the tool will be graded. Make smart choices. Have non tech artists try your tool and get feedback. See what works and what is frustrating. Like playtesting, but for your work. Think about what the user will probably want to do with your tool and try to incorporate it.
BONUS:
15-30 bonus points will be awarded for the ability to save any changes made in the imported scene back out to the XML and the ability to bring it back in, with the changes, at a later time. Assume completely different work environments at any and all times.
Description:
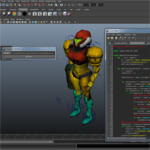
For this project, you can see that I opted to make a character import tool rather than an environment import tool. I figured the best case would be that we could use the tool for Grapple (which would potentially and hopefully have many different characters that could reuse skeletons and rigs) and in the worst case, the tool would just be a nice tech art piece. With that in mind, I took my Samus model and decoupled it into different scenes–the 3d model (without textures or materials), the skeleton, and the NURBS controllers.
The tool is comprised of five scripts–one for the GUI, one to import the model and assign materials, one to import any constraints for the rig, one to import skin weights, and one to delegate all of the tasks. There are also two additional scripts for exporting constraints and exporting weights. These two scripts create XML files that are used by the tool when importing. I wanted to integrate these export options into the GUI so that they didn’t have to be run separately, but I ran out of time. Since I wasn’t able to incorporate these in with the other scripts, they use hard-coded paths rather than relational paths like the other scripts use (so be aware of this if you try to use the tool).
Our teacher wanted the GUI to be as simple as possible. “It should have a Get Art button that does everything,” so that’s exactly what I went for :P. When the GUI appears, the user must search for an XML file containing the different components to be imported and combined (model, skeleton, controllers, textures). After that, one can press the GET ART button, and everything else is automatic. The tool imports the different scenes and applies materials, skin weights, and constraints. Then, the user has a fully functioning character rig!
You can download the tool here. For instructions on how to use the tool, read the README.txt file in the .zip.
Added 3/20/13 @ 12:00 AM
Description:
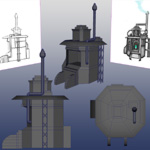
- Modeled a 3D concept for a generator building in Grapple, post Vertical Slice
- Generator would hold “power lanterns” that would help power the city
Credits:
- Generator concept by Karen McCarthy
Added 3/11/13 @ 1:30 AM
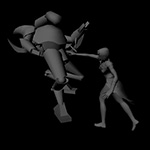
- Animated the game’s medium enemy using one of UDK’s built-in skeletons (K_AnimHuman_BaseMale) in Maya
- Some clean-up was required on an individual basis
- The Run Forward animation was greatly manipulated to give the enemy a bigger stride and more threatening run
- Created a AnimSet/AnimTree in UDK to call and control the animations
- Animations:
- Attack
- Idle
- Jump Idle (while falling)
- Jump Landing
- Jump Preland
- Jump Up
- Run Forward
- Run Backward
- Run Left
- Run Right
- Stand from Cannonball Entrance
- Take Damage
- Ripping Skeleton/Animations from UDK
- Medium Enemy Rigging
Added 3/10/13 @ 11:57 PM
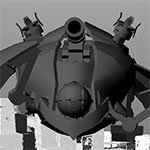
- Animated the Destrozar for the game’s final sequence
- Destrozar Model
- Destrozar Rig


