


")
Added Tuesday, January 22nd, 2013 @ 12:00 AM
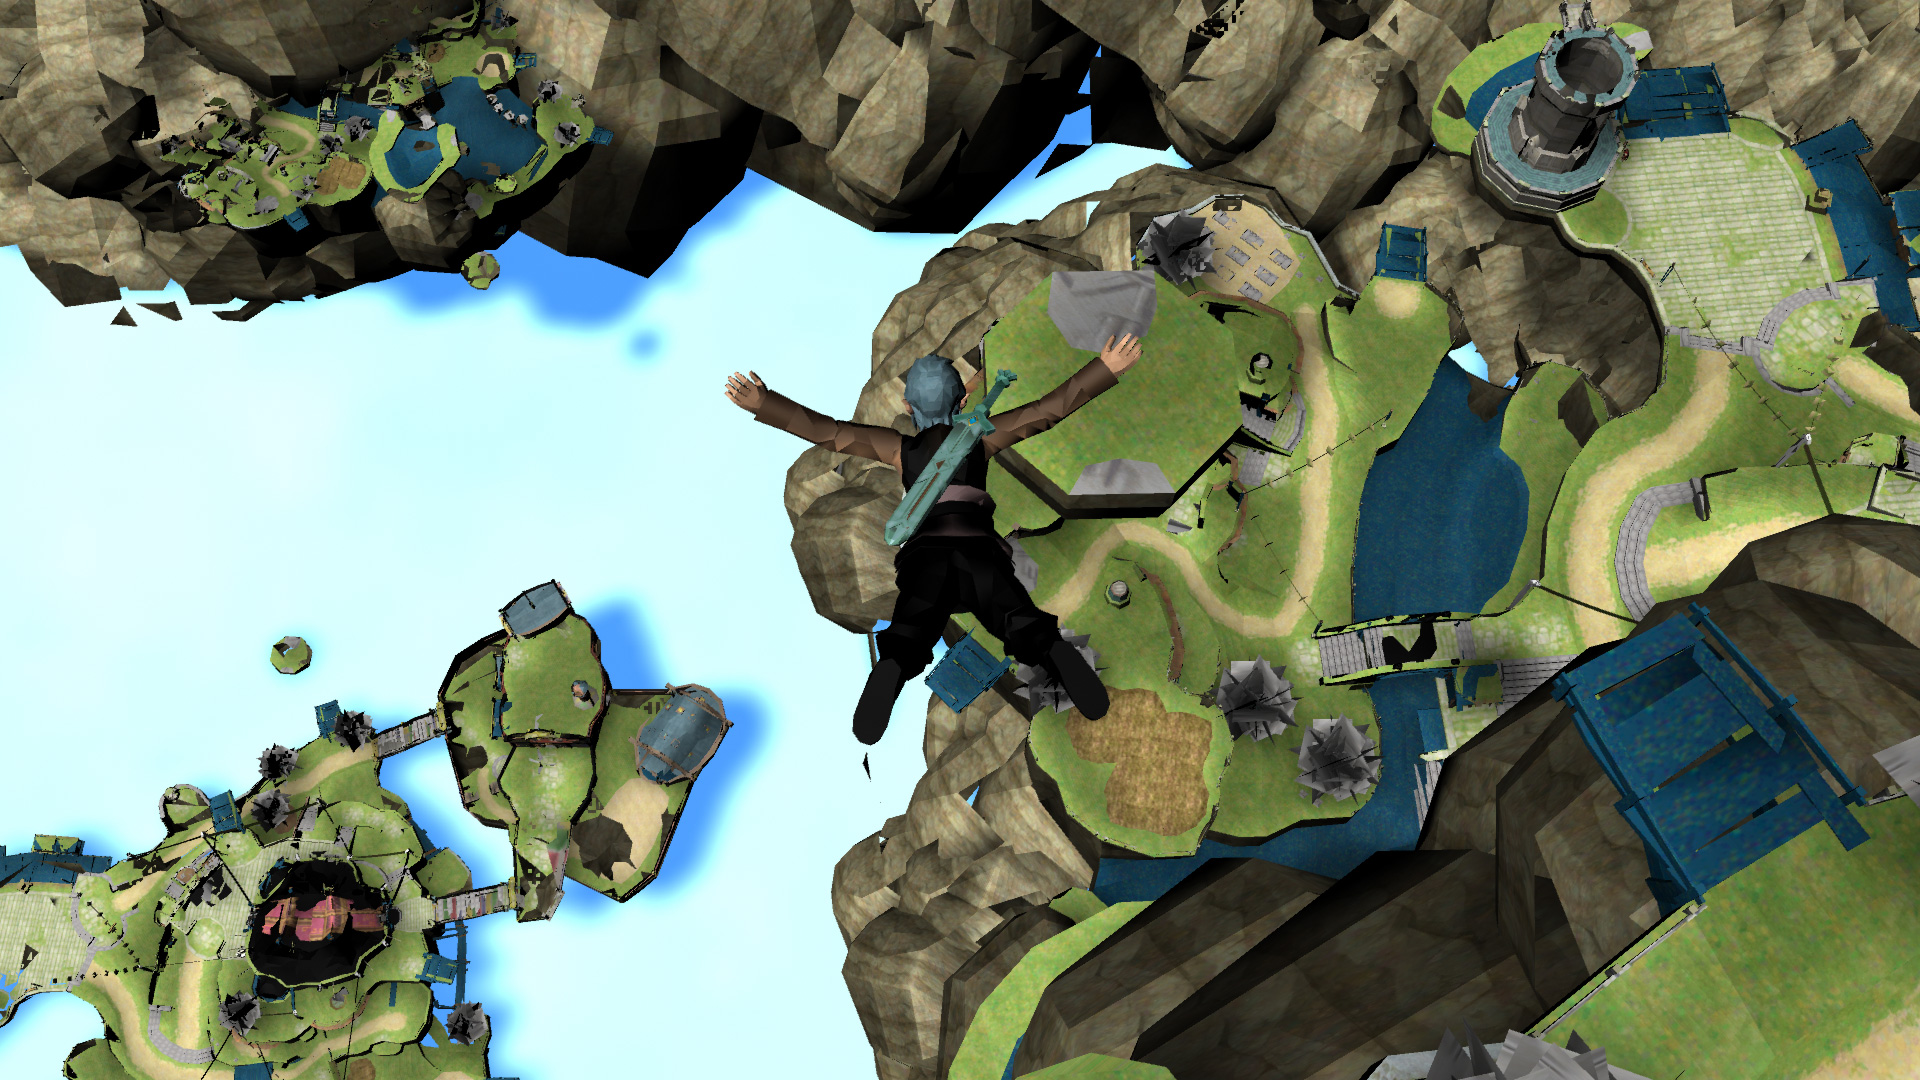
- Models (characters and environments) were ripped from The Legend of Zelda: Skyward Sword and Shadow of the Colossus and imported/cleaned up in Maya
- This was to see the scale size of those games’ characters to the environments/enemies
- Skyward Sword was used to:
- Compare the size of Link to Levias, a floating whale-like creature that Link traverses
- Create the 3D piece of concept (not primarily a scale study, but still gave an idea of district elevation/scale)
- Shadow of the Colossus was used to:
- Compare the size of Wander to the Colossi
- Skyward Sword was used to:
- Traversing Levias and Colossi are similar to traversing the Destrozar
Related Work:
- Mood Board
- Concept Art
")
Added Monday, January 14th, 2013 @ 12:00 AM
Description:
- Concept for Grapple, pre Vertical Slice
- 2D concept for jumping from one district platform to a lower district platform
- 3D concept for jumping from one district platform to a lower district platform
- Created in Maya using models from The Legend of Zelda: Skyward Sword
- Concept for Grapple “title screen”
- Idea is that title screen would be in-game and interactive
- When player pressed “start,” Amina would jump off of platform, camera would follow her, and player would immediately be in control
Related Work:
- None
")
Added Sunday, January 13th, 2013 @ 12:00 AM
- Scrum Hero is the motivational game we played in conjunction with the scrum workflow
- Each team member chose an avatar to use in the game
- I collected and, in many cases, (re)created the players’ 8-bit/16-bit avatars
- I did not create any of these sprites from scratch. All were found online, and I touched up many of them.
Related Work:
- Mood Board

Added Tuesday, December 11th, 2012 @ 12:00 AM
Class:
Rapid Prototype Production (RPP) 1
Game:
Galactic Bumper Monkeys
Assignment:
You will be split into teams of 4-5 consisting of producers, programmers, and artists. In two weeks, polish a previous RPP game that was created this semester.
Description:
Galactic Bumper Monkeys is what you get when you make Asteroids multiplayer and put monkeys in it. Up to four players take control of monkeys flying through the cosmos in their monkey space ships.
The object of the game is to outlast the other players. Each player starts with five lives. Each time a player gets hit by an asteroid, he/she looses a life. The last player with remaining lives wins (players can still play after all of their lives are lost so that they can still mess with the other players). When players shoot asteroids, they break into multiple smaller pieces. There are also space bananas floating around that players can collect. Collecting bananas allows players to activate abilities. They can either surround themselves with a temporary force field or use an energy blast that blows surrounding objects away.
Originally, the game only supported two players (a pink monkey and a blue monkey) and did not allow monkeys to shoot. The majority of the polish work was creating the assets and support for the other two monkeys for a maximum of four players. If I remember correctly, the only art assets I did not touch in any way were the asteroids and the background image. Everything else–monkeys, bananas, power-ups, UI, as well as music– I polished, edited, or created in some way. All of the game’s original art was created by Sean Buck.
Controls:
Blue Monkey:
- WASD to move (forward, turn left, backwards, turn right)
- 4 to shoot
- 3 to use energy push
- 2 to use shield
Green Monkey:
- TFGH to move (forward, turn left, backwards, turn right)
- 8 to shoot
- 7 to use energy push
- 6 to use shield
Purple Monkey:
- IJKL to move (forward, turn left, backwards, turn right)
- = to shoot
- – to use energy push
- 0 to use shield
Pink Monkey:
- Up, left, down, right arrows to move
- 0 (number pad) to shoot
- 3 (number pad) to use energy push
- 2 (number pad) to use shield
You can also use a controller if you have one. In order to use it, use this program to configure controls.
Original Credits:
Artist – Sean Buck
Producers – Naticia Browder and Drew Napoli
Programmers – Justin Augspurger and Vinash Seenath
Polish Credits:
Artist – Adam Grayson
Producers – Evan DeBack and Amber Reboyro
Programmers – Matt Bradberry and Chris Sosa
Added Monday, December 10th, 2012 @ 12:01 AM
Class:
PIE 1 Art- Animation
Assignment:
Take five actions from our motion capture shoots, apply them to our models, and edit them so that they could be used in a game (shorten them, make them visually accurate, exaggerate movement, etc.). Each animation should begin and end in the same idle pose so that the animations can be seamlessly strung together both with themselves and each other. Take the mocap data from Motion Builder, and apply/edit the animations in Maya. Each animation should be exported as a clip. In addition to each animation as a separate clip, the clips should be strung together using Maya’s Trax Editor. The animation containing all five clips should NOT be stationary. For example, if the character walks forward in the first clip, the second clip should start from that location, not back at the origin.
Complete the autorigging script we’ve been working on and make it “smarter” (more concise, more dynamic, etc.). If necessary, continue working on your rig.
Create a shelf in Maya that recreates the autorigging pipeline. Include any buttons that you made to make the process easier while you were working. One of the buttons must run the autorigging script.
You may use any model that you like for this assignment (including the one you’ve been working on for the previous assignments). However, we encourage you to use the model from your final modeling assignment.
Description:
These are six separate animations I made for this assignment. Rather than using the Ganondorf model I had been using for the previous assignments, I used my redesigned Samus model (from my final modeling assignment). This required me to make a skeleton, skin and weight the model, and make a new set of controllers. Aside from our teacher encouraging us to use our final modeling character, I wanted to use a different model (than Ganondorf) because it would force me to make my autorigging script more dynamic (allow the use of different models) and still work correctly.
For the running jump animation, I pictured it as more of a cinematic animation than a gameplay animation which is why it’s so long. The intention is that Samus is jumping out of a spaceship or something onto another spaceship (or something :P). The area in the middle has much less gravity (or perhaps no gravity) than the starting and ending areas, so the motion in the middle is slowed a little to simulate that. The sliding at the end is an intentional way of showing her slowing from the momentum of the jump (or at least an attempt to do so :P).
All animations start and end in the idle position.
Fun fact: I was the mocap actor for these 😀

Added Monday, December 10th, 2012 @ 12:00 AM
Class:
PIE 1 Art- Animation
Assignment:
Take five actions from our motion capture shoots, apply them to our models, and edit them so that they could be used in a game (shorten them, make them visually accurate, exaggerate movement, etc.). Each animation should begin and end in the same idle pose so that the animations can be seamlessly strung together both with themselves and each other. Take the mocap data from Motion Builder, and apply/edit the animations in Maya. Each animation should be exported as a clip. In addition to each animation as a separate clip, the clips should be strung together using Maya’s Trax Editor. The animation containing all five clips should NOT be stationary. For example, if the character walks forward in the first clip, the second clip should start from that location, not back at the origin.
Complete the autorigging script we’ve been working on and make it “smarter” (more concise, more dynamic, etc.). If necessary, continue working on your rig.
Create a shelf in Maya that recreates the autorigging pipeline. Include any buttons that you made to make the process easier while you were working. One of the buttons must run the autorigging script.
You may use any model that you like for this assignment (including the one you’ve been working on for the previous assignments). However, we encourage you to use the model from your final modeling assignment.
Description:
Rather than using the Ganondorf model I had been using for the previous assignments, I used my redesigned Samus model (from my final modeling assignment). This required me to make a skeleton, skin and weight the model, and make a new set of controllers. Aside from our teacher encouraging us to use our final modeling character, I wanted to use a different model (than Ganondorf) because it would force me to make my autorigging script more dynamic (allow the use of different models) and still work correctly.
This is a video demonstrating my MEL autorigging script.
Fun fact: I was the mocap actor for this 😀

Added 12/9/12 @ 12:00 AM
Class:
PIE 1 Art- Modeling
Assignment:
Use your high res redesigned Samus model from the previous assignment to generate a normal map for your low res Samus model. Suggested programs with which to do this are xNormal and/or Maya itself. In addition to creating the normal map, texture your final, low res model (which will require UVing the model if you haven’t already done that). You may use whatever texture maps you’d like. They may be up to 2048×2048 each. If you need to, please make changes to the model itself. Remember to stay within the 4,000-5,000 tri limit. As with the previous few assignments, make sure your model is bound to a skeleton. Treat this model as if it were the final model that was going into a game.
Description:
The entire time I was making the high res model, I was worried that a lot of the detail wouldn’t transfer well to the low res model in the normal map. Unfortunately, I was right. That said, once I finished texturing and posing Samus and lighting the scene, I was pretty happy with the outcome. There are definitely places that I could go back and tweak, specifically to round things out and make the model look less blocky, but it’s not too shabby overall 🙂
Again, though, the normals were a pain as was the ambient occlusion. Unfortunately EVERYONE had problems with the normal maps, but we all got them to work in the end. At first, I tried using xNormal for both the normals and the AO. I exported each body part as its own separate .fbx to load into xNormal. Aside from taking forever to do (both exporting and xNormal itself), it didn’t really generate very good results. I also tried Faogen for the AO, but that didn’t work out either, so I ended up using Maya to produce both the normals and AO. Then I threw them into Photoshop with the color and incandescence maps to make the final textures.
On top of all of this, I kept tweaking the shape of the low res model. I did a lot of work removing unnecessary geometry so that I could use the tris in other areas that needed the detail more (such as the legs, helmet, and shoulder dome things).
Note that I did not make the head inside of the helmet (it’s Brawl’s Zero Suit Samus). I added it rather than using a plane with an image on it because I knew I was going to rotate the model in my presentation. Thankfully the teacher didn’t mind that that put it over the tri limit since it wasn’t really part of the model 😛
The “revisions” mentioned in the image descriptions refer to the numbered save files I have for each model. For example, I have 67 (yes, sixty-seven :P) different files, each being more complete than the last, with the 67th being the final model that I turned in.
Tris: 4,912 (not including the head in the helmet or the stand she’s on), 7,228 and 9,850 (including the head and environment respectively if you’re curious)
Maps: Color (2048×2048), Ambient Occlusion (2048×2048), Incandescence (2048×2048), Normal (2048×2048)
 Animations")
Added 12/8/12 @ 12:00 AM
Class:
PIE 1 Art- Animation
Assignment:
Take five actions from our motion capture shoots, apply them to our models, and edit them so that they could be used in a game (shorten them, make them visually accurate, exaggerate movement, etc.). Each animation should begin and end in the same idle pose so that the animations can be seamlessly strung together both with themselves and each other. Take the mocap data from Motion Builder, and apply/edit the animations in Maya. Each animation should be exported as a clip. In addition to each animation as a separate clip, the clips should be strung together using Maya’s Trax Editor. The animation containing all five clips should NOT be stationary. For example, if the character walks forward in the first clip, the second clip should start from that location, not back at the origin.
Complete the autorigging script we’ve been working on and make it “smarter” (more concise, more dynamic, etc.). If necessary, continue working on your rig.
Create a shelf in Maya that recreates the autorigging pipeline. Include any buttons that you made to make the process easier while you were working. One of the buttons must run the autorigging script.
You may use any model that you like for this assignment (including the one you’ve been working on for the previous assignments). However, we encourage you to use the model from your final modeling assignment.
Description:
Rather than using the Ganondorf model I had been using for the previous assignments, I used my redesigned Samus model (from my final modeling assignment). This required me to make a skeleton, skin and weight the model, and make a new set of controllers. Aside from our teacher encouraging us to use our final modeling character, I wanted to use a different model (than Ganondorf) because it would force me to make my autorigging script more dynamic (allow the use of different models) and still work correctly.
These are the original, unedited animations from the mocap shoot.
Fun fact: I was the mocap actor for this 😀

Added 11/30/12 @ 12:01 AM
About FIEA’s Capstone Games
One of the main draws of FIEA (at least in my opinion) is the students’ work on the Capstone games. The Capstone games are complete video games that the students work on for a little over two semesters (eight months), all the while balancing the work of their other classes (and life in general) with the development of the games. Their purpose is not only to allow the students to produce a full game for their portfolios, but also to prepare the students for working in the video game industry by experiencing intense work schedules, learning and developing their skills in their respective focuses, and working on a team with many different people and personalities. By the end of the third semester, the students will have a complete, fully playable 10-20 minute (sometimes more) video game experience.
Before all of that though, students must pitch their game ideas! Late in the first semester, production students (as well as artists or programmers who attended the production classes) are allowed to pitch ideas for games they have. While I was an art student, I had attended all of the production classes, so I decided to develop an idea I had had for a while, pitch it, and see what the teachers and other students thought of it. Maybe it would even make it through the pitch and go on to be developed! The game I pitched is called The Network. In short, it’s a cyberpunk, first-person, free running platformer. The original idea came from me wondering what you would get if you combined Mirror’s Edge and Ghost in the Shell, so for those familiar with those, it should give you a very general idea about what I was trying to accomplish.
Original Game Design Document

Click to view The Network‘s game design document.
Many of the production class homework assignments were to write game design documents (GDD), so even before students pitched their game ideas, many students, including myself, used the final GDD to develop ideas they had for Capstone games. For several weeks, I jotted down notes about this idea I’d had for a game. So many notes… After I had everything I could think of down on paper, I began converting my notes into a formal GDD.
Five Minute Pitches

Click to view the The Network‘s Five Minute Pitch post.
After the students come up with the ideas, the school holds the first round of Capstone pitches. All of the students who pitch have five minutes to present their ideas to the teachers and fellow students. After that, the students and teachers vote for their favorite games, and usually about 10 games are voted to go to the next round of pitches. The Network was one of those games!
Over the next couple of weeks, the remaining games were developed even more. For our Cohort, the teachers tried something a little different. Instead of just having producers work on the games, they also had the artists help to create preliminary art for the games, so each game’s team consisted of 2-3 producers and 1-2 artists. In addition to myself, Evan DeBack (producer), Nathan Strickland (producer), and Veronica Jenkins (artist) joined team Network. For the next two weeks, we worked tirelessly on developing ideas, art, and the presentation for The Network.
Final Pitch

Click to view the The Network‘s Final Pitch post.
There were many sleepless nights in preparation for the next round of pitches. We took the pages and pages of ideas I originally had, whittled them down to be more in scope, fine-tuned them, and came up with a few new ideas along the way. Unfortunately, we spent so much time working on ideas for the game that we didn’t leave ourselves quite enough time to prepare for the presentation. While the presentation wasn’t terrible, more time to refine it would have doubtlessly helped.
So along came the day before the presentation… We were still working vehemently to finish everything we needed for the presentation, and we ended up working all night and not getting any sleep. When presentation time came around, I was sleep deprived, nervous, and had barely gotten to prepare. The perfect storm for a presentation… I’ve been told by others that I didn’t exhibit those traits quite as visibly as I thought, but you can be the judge when you watch the video :P. Regardless of how I thought I presented, The Network did not make it through this round.
Afterwards, I asked students and teachers if they could provide some feedback on what they thought of the presentation as well as provide some reasons as to why they didn’t vote The Network as highly as other games. The main responses I received said that the presentation was fine, but many wished that we had had some sort of demo (something the four of us on the team really, really wanted but didn’t have time to create) and that the main reason they didn’t favor the game was because of scope. There was just too much to the game, and many didn’t think that everything could be accomplished in the two semester period (something I was a little unsure of myself). So while my game idea didn’t continue development, it was reassuring to know that it was voted in the top 10 out of more than 20 games, and that people still really liked the idea, it was just too big for an eight-month development cycle. I do still have ideas for the game floating around in my head, so maybe one day I’ll develop those into something a little more tangible 🙂

Added 11/30/12 @ 12:00 AM
After The Network made it through the five minute pitches, the game needed a team to be further developed. In previous years at FIEA, it would mainly be the producers who would team up and work on the remaining Capstone games, but this year, the teachers wanted to include artists on the teams in order to create some preliminary art for the projects. The teachers told us that the game creators and the artists would soon pick which game they were on. Artists’ names would be put in one hat and the game creator’s names would be put in another hat. We would go back and forth between the artists and the creators choosing names from the hats. A creator would pick an artist’s name, and that artist would choose the game he or she would like to work on. That artist would then pick a creator’s name, and that person would choose an artist he or she would like to work on his/her game. He/she would pick another artist’s name, and so on and so forth. Since I was an artist, but my game also made it through, I needed to find a producer willing to take over the helm. It was possible that I would be chosen to work on a different game than The Network! I could also choose to work on another game, but that, of course, was not going to happen :P.
Thankfully, both Evan DeBack and Nathan Strickland were kind enough to volunteer to be the producers for The Network. When it came time to team artists with the games, I choose to stick with The Network (duh), and Veronica Jenkins also decided to join the team! We were now four strong and had a lot of work to do to prepare for the final pitch.
Over the next several weeks, we held multiple open meetings that any interested students could join to discuss ideas for the game. After all, this game was going to be voted in or out by our fellow students, so we wanted to see what they wanted this game to become. Meanwhile, Veronica and I worked on creating preliminary artwork for the game. Veronica’s specialty was character art, so she took over designing the look for our potential main characters and enemies. We wanted realistic characters with an aesthetic that took influences from Mirror’s Edge, Tron, and a few other sources. We wanted the characters to look sleek and almost aerodynamic (since they would be running a lot) with the use of bright, neon colors accenting their otherwise dark design. Also, since there would be human/machine hybrids, Veronica created a few characters with robotic body parts.
Meanwhile, I worked on ideas for the environment and the logo, as well as helping Evan and Nathan with design ideas. For the environment, I created a MEL script for Maya that allowed me to immediately create an area of differently shaped boxes. The result looked like a bustling city full of tall buildings and skyscrapers. With the script I was able to specify the size of the area to populate, how densely packed I wanted the area to be, the ranges in size of the buildings, and the size and location of where I wanted taller buildings (skyscrapers) to appear. It was an incredibly effective way to quickly create and iterate through different looking cityscapes in the basic style I was envisioning. At the same time, I kept sketching out different ideas for the game’s logo. I knew I wanted it to be animated in some way, but I first had to design the thing! After I came up with a design I liked, I started to mock it up in Maya so that I could give it some animation. I knew the general look I wanted to achieve, but it took me a while to really nail it.
A few days before the presentations, I set up something special. In FIEA, there’s an area called the Nexus. It’s a nice open area where hallways converge that has three projectors acting as one long projection on the wall. It’s used to showcase previous student games as well as display RSS feeds with news from the gaming industry. The teachers allowed me to create and display a special The Network themed background in the Nexus as well as include a custom RSS feed that we created with fictional “news” reports from the world of The Network. Since the game had to do with a giant, “evil” corporation controlling the views of the public in a non-threatening manner, it seemed appropriate 😛
On top of everything else, we had to prepare our presentation. Thankfully, Evan and Nathan took over most of the work putting the presentation together as well as writing up a script that would highlight the major points we wanted to talk about. In order to convey the mood of the game (a dystopic society unknowingly controlled by a big, “evil” corporation), we decided to put together a few videos for the presentation. The first half of the presentation would be trying to get that point across. I would present myself as a rebellious citizen from this society who has realized the terrible impact this large corporation has had on both the world and its populace. I would try to convince the people (the audience in the room) of this message but would quickly be detected and chased out of the room by agents of the corporation. The rest of the presentation would talk about the game’s ideas, its aesthetic, and its gameplay.
Unfortunately, the game did not make it through this round. That said, we had fun working on it :D. Afterwards, I asked students and teachers if they could provide some feedback on what they thought of the presentation as well as provide some reasons as to why they didn’t vote The Network as highly as other games. The main reasons were that people wanted to see a demo (something the four of us on the team really wanted ourselves but didn’t have time to make) and that the scope of the game seemed too big for an eight month development period (something we were worried about too). So in the end, it was reassuring to know that the game was voted in the top 10 of over 20 games pitched and that people still really liked the idea, it was just too big to create in eight months.

Added 11/27/12 @ 12:00 AM
Class:
PIE 1 Art- Modeling
Assignment:
Use Maya to finish working on your hard surface, high res Samus redesign model from the previous assignment. Don’t worry about texturing or lighting or anything yet, just focus on the model itself. Again, because this model wouldn’t be used in a game, and it’s purpose is to provide a normal map for your low res mesh, there is no tri limit.
Description:
Using the top half of my high res model from the previous assignment, I finished the rest of the body. On top of adding detail to the model, I went back and redid a lot of the original, low res model too. At the same time, I made those same corrections/tweaks to the high res model. While I was working on the model, I really wasn’t too happy with it, but once I finished, I was pretty pleased with how it turned out 😀
The “revisions” mentioned in the image descriptions refer to the numbered save files I have for each model. For example, I have 16 different files, each being more complete than the last, with the 16th being the final model that I turned in.
Tris: 48,362