Added Tuesday, February 21st, 2012 @ 8:49 PM
This was the first project for my image processes class. The general idea was to create some type of apparatus that made markings of some sort, whether they by physical or digital markings. This was a collaborative piece as students had to partner up with at least one other person. My two friends, Joel and Chase, and I decided to work together. I remember one of our first ideas was to create some kind of remote control vehicle and attach a camera to it and see what kind of images that would produce. I know we thought about a remote control car and a remote control blimp. Instead of making an electronic, remote control blimp, we also thought about attaching a small camera to a kite. The problem then was how to activate the shutter. If we were to use a video camera, it would have to have its own power source (batteries) as well as being light, small, and inexpensive (in case something went wrong and it ended up breaking…).
We bought a remote control car in order to kind of gauge how likely using something like that would be. The only remote control car we could find was one at the local Radio Shack. Mainly, we were testing how far the range of the remote would reach. We figured that if it the range was long enough, we could gut the car and try to build a blimp. Unfortunately, the range was maaaaaaybe 10 feet… It was pretty terrible.
I then suggested that perhaps we try a Wii remote. Since I had used Wiimotes in a few of my previous projects, I had become familiar with how they worked and how to manipulate and use them outside of the Wii. Because Wiimotes use bluetooth, we thought we would see if its range was any better than the R/C car.
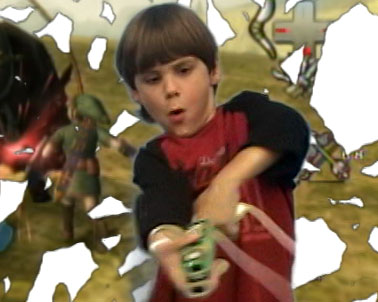
I don’t remember why or how, but we eventually moved past our original idea (attach a camera to an R/C vehicle). However, we still wanted to use the Wiimote as part of our apparatus. We soon decided to try using just the Wiimote as our apparatus and have it make some kind of digital markings. We came up with in idea. Many Wii games use the Wiimote to control an onscreen cursor while others use it to control actions of onscreen characters (and some use it for both). Why not try to do something like that, but take it, at least partially, out of video games? Could we use the Wiimote to control both a video game and something else (presumably to make markings)? As it turned out, yes, yes we could. However, since a Wiimote can only be synced to one device at a time, we ended up using two Wiimotes that we attached together with rubber bands. One Wiimote would be synced to the Wii and control a video game while the other would be synced to a computer and control Photoshop’s brush tool. Because the Wiimotes were attached to each other, the markings being made in Photoshop by the one Wiimote would be a visual recording of the movement of the user’s hand while he or she was playing the Wii game.
The final video had just a little bit more added to it. The marks being made in Photoshop would reveal the game being played behind the user as he or she played. We had Chase’s younger cousin, Noah, use our apparatus. We figured a younger kid who was more interested in the game than the mark making would provide more intense arm motions as he or she would “get into the game” mores o than, say, one of us.
Original Project Assignment
PROJECT ONE
Relating the apparatus to the content of the work
CONCEPTUAL OBJECTIVE
In this project you and a partner/s will create an apparatus for recording an image or make a mark. Then you will use this apparatus to create a piece. The piece and the apparatus must be related in terms of content. For instance if you make a periscope type lens to attach to a digital camera, then what you photograph must be related to the idea of a periscope and what periscopes do—look around corners, look above water etc.
TECHNICAL OBJECTIVES
- Create and use a device or apparatus for image manipulation and generation.
- Experiment and make work using your device
FORMAT
The format of this project will be whatever your device does. It may be a set of digital prints or a images on screen or even a video. You may want to document a person using the apparatus as well as the work itself or even documentation of the work if the device capture a performance.
IMAGE COLLECTION
This project involves both making a device that works and experimenting with the device so that you become facile enough with its operation to make something worthwhile.
Think about or ask yourself the following as preparation or during this process:
- What is the effect of or feelings that result from the quality of images that created by the apparatus?
- Does the device make images in one way or are there different sets of parameters that you can control when you make this device?
- What happens to my images when I change the setting of the apparatus?
- How does this particular process of creating images relate to the apparatus?
- Experiment, experiment, experiment.
PROCESS
- You should record (on the blog) what you did so that you can duplicate it again if you need to, BUT in the final project the effect of what you made and how it works with the rest of the piece is paramount. Cooking is an analogous way of thinking about this. The recipe is very important because it helps you to make the cake and if the cake turns out to be tasty you will want to duplicate the result, but ultimately you want your guest or friends to enjoy and remember the taste of your cake. It does not matter so much on the specifics of the recipe.
INTEGRATION—PUTTING IT ALL TOGETHER
After you have collected all of your images, LOOK at them. Play around with them. Do they follow a sequence? Look each set of images separately. Look at them mixed up together. You may want to print them out and lay them out on the floor before you organize them digitally. You may even want to print more than one copy of an image as part of this process. Sometime first touching and physically manipulating images even if you intend to present them on screen can be very helpful in organizing your thoughts.
What is the function of the apparatus in terms of mark making? What does your machine do? How do you think the viewers/participants will relate to the apparatus? The markings made by the apparatus?
Does the apparatus behave in a way that is related to possible content with respect to the marks or images that it makes? Sometimes the connections between the materiality of the medium and the final product seem really clear, but confounds the viewer. Put yourself in the place of someone who has never seen the work or knows the backstory. Does it still “work”?
Lastly and this is part of why we are in school, show and discuss you ideas with one another. This is what we do during critique.
Added Tuesday, February 21st, 2012 @ 8:47 PM
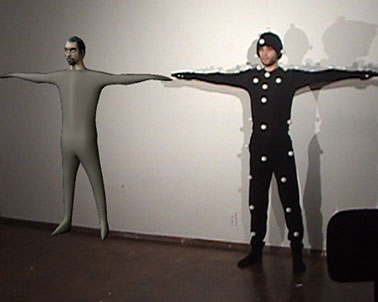
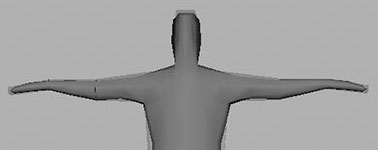
My final project for my animation class junior year. The previous three projects were basically just check up points for the semester-long project. I had decided early on in the semester that I finally wanted to try my hands at motion capture, so that’s exactly what I did!
The model in the video is an “incomplete” (quotes because it being incomplete was part of the concept) model of me. The head, however, is recognizable as my face. Then, as the title suggests, the animation was motion captured by me.
Added Tuesday, February 21st, 2012 @ 8:44 PM
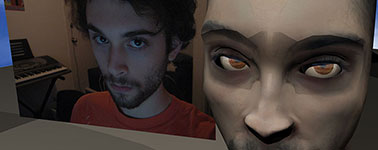
Another check up presentation for our final project. I had been working on modeling and texturing my head, so that’s what I presented.
Added Tuesday, February 21st, 2012 @ 8:41 PM
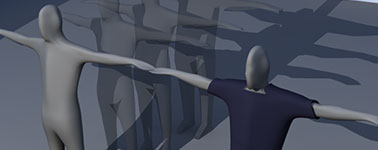
This was a check up “project” where we were supposed to present images showing how far we were in the process of our final project. As you can see, I had continued working on the model I showed for the concept presentation. I also modeled some quick clothes to give a better idea of how the finished “me” would look.
Added Tuesday, February 21st, 2012 @ 8:39 PM
For the remainder of the semester (in my animation class), we were to work on one project to be presented at the end of the semester. This “project” was simply to present the idea for the piece we would like to work on. I don’t remember what exactly we were required to show for the this presentation, but, as you can see, I presented a model of myself that I had started. I’m sure I also presented the general idea that I wanted to create some kind of motion captured video for the final product.
Added Tuesday, February 21st, 2012 @ 8:35 PM
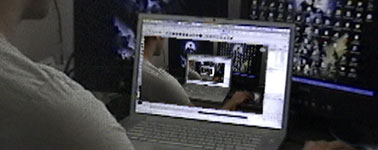
For this project, we were supposed to make a video that created a crystal image. In the video, this man (one of my roommates at the time) is using Maya on the laptop. The idea was that he was modeling himself and his immediate environment in Maya. But also, the recreation of himself that he was modeling was modeling a recreation of him himself that was also modeling a recreation of himself and so on and so forth.
Having recently watched Escape from the Planet of the Apes, I feel the need to point out a similar scene in the movie in which Dr. Otto Hasslein explains infinite regression:
Added 2/21/12 @ 8:34 PM
This project was, you guessed it, a strange loop animation. I believe we were supposed to take a clip from a movie or TV show and turn it into a strange loop, or rather, present it as one. My mind immediately went to Dragon Ball Z. I figured that with all of the repetitious animation in the show, there was bound to be at least one clip I could use as a strange loop. Using a clip from DBZ would also allow me to point out the gross amount of reused animation that somehow manages to result in tension and excitement (to the viewer) in not just DBZ but in many anime and even many non-anime cartoons.
Once I found a few clips to use (which can be viewed down below), I decided to make the clip a little more abstract by decreasing the number of recognizable shapes (or faces). It would seem that appeared to add to the piece. Though I did not think of it while making the video, it was pointed out during crit that the video looked kind of like a canon shooting out smoke resulting from a grand explosion of force (this was one example). We noticed that those who were not familiar with DBZ tended see this figure onscreen as something totally different than those who knew where this clip was from (which is not totally surprising).
If you’re interested, the clip is from the episode of DBZ where Goku defeats Kid Buu. This clip is of Kid Buu’s foot digging into the ground as he tries to hold back an energy blast (a spirit bomb if I remember correctly) from Goku. The black part is Kid Buu’s boot and the white is his pants. The green below the black is the ground crumbing below his foot.
Added 2/21/12 @ 8:29 PM
A short animated film created for an intro to computer animation project. This was our final project for the semester, and I decided that I wanted to make a sequel to the original Mice movie. More specifically, this movie was meant to be a part of the original, but I ran out of time to put it in, so I was more than happy to have an opportunity to continue working on it!
All models and animation are done by me.
Added 2/21/12 @ 8:28 PM
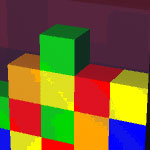
For this project, we were either supposed to create an animation solely using MEL scripts to animation, or we were just supposed to use MEL to animation at least one thing. I’m thinking it was the latter, but I chose to do the former. Either way, I decided to create a Tetris/Bejeweled-like animation. The MEL script that runs the entire animation creates a block of a random color (out of five colors), starts it in the top “row” in the middle “column.” The block then moves down on “row” at a steady pace while the script randomly moves it from side to side. Once the block hits either the bottom of the stage or hits the top of another block, a new block is created and the process repeated.
Two other things that I thought I programmed in (but I don’t see in the videos…) are the when the stage is full and there are no more possible moves to make, the stage would be cleared of blocks, and the entire process would start over. The other is that I thought I had it so that if three blocks or more of the same color lined up together horizontally or vertically, they would disappear and any blocks above them would move down. Maybe I just had planned to program those but never did… :-/
Added 2/21/12 @ 8:25 PM
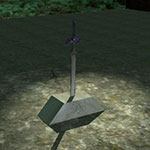
A short animated film created for an intro to computer animation project. This assignment was to animate a walk cycle. I believe we were also supposed to use the model that we made the previous semester (in intro to computer modeling) as the character to do the walking. Since I had modeled Link, I decided to have him walk up to and pull out the Master Sword.
I remember having a lot of difficulty modeling Link because my reference model was screwy, so I ended up just using the model from the game (Twilight Princess). The rigging and animation, however, is all by me.
Also, it’s kind of hard to notice, but I think this was the first time I used blend shapes for facial animation. After Link grabs the Master Sword, the camera zooms to his face. His eyebrows lower and he frowns in determination. I swear it was more noticeable when I was animating it 😛
Added 2/21/12 @ 8:22 PM
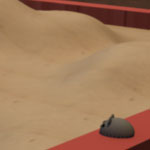
A short animated film created for an intro to computer animation project. The assignment was to create a short animated movie that used set driven keys. I used them in two places—one to make the mice bounce (breathe) while they’re sleeping, and two to move the swings back and forth.
All models and animation are done by me.


