Added Tuesday, February 21st, 2012 @ 9:26 PM
The WiiMersioN project is the first in a set of three projects (all carrying the “WiiMersioN” name) I created using Nintendo Wii controllers as a type of “augmented” reality through real life motions corresponding to the same motions onscreen. With these projects I was basically challenging myself to see how closely I could mimic real life through video games. To think of it in extreme terms, I was trying to accomplish full virtual/augmented reality by using the tools at my disposal.
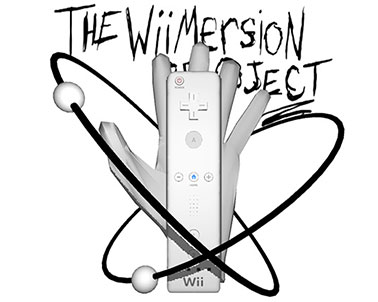
The WiiMersioN Project begins by displaying the 3D-rendered logo along with onscreen instructions prompting players to connect a Wii remote to the computer via bluetooth. The game alerts the player when the Wii remote successfully connects then prompts him or her to connect a second Wii remote. After both Wii remotes are synced, the player can press the + button to begin the game.
The game is an interactive crystal image. The player holds one Wii remote in each hand in real life in order to control the virtual hands onscreen. There are also two virtual Wii remotes on a table that the player can pick up (while using the real Wii remotes to instruct the virtual arms to do so). Lastly, there is a TV screen past the table. The TV displays exactly what the player is looking at—the game! Of course inside that game is another instance of the game, and so an and so forth.
The only objects I didn’t model are the two Wii remote models. As far as coding, I found a plugin for Unity that allowed connection with Wii remotes, but I modified it, added to it, and used it to fit my needs.
ORIGINAL DOCUMENTATION
Original Idea
(In an e-mail to professor)
Hi, Jack, this is Adam Grayson. I’d just like to run this project idea by you before class Tuesday to see what you think.
So what I’ve been thinking is that I can make a game that implements two Wii remotes. The player would hold one in eaach hand. These Wiimotes would correspond to two arms/hands that are on-screen. The movement of the virtual hands would respond to the movements of the player’s hands via the two Wiimotes. So, for example, if the player moves his/her left hand forward, the left virtual hand would move forward. In order to grab objects in-game, I was thinking that the player could press/hold the B button on the Wiimote. This button is on the bottom of the controller as a sort of trigger. I think this is a good simulation of one grasping something. So when the B button is pressed, the virtual hand makes a grasping gesture; if some object is in front of the hand when the button is pressed, the object will be picked up. In order to release the object, the player would release the B button.
The movements of the virtual hands would respond to the three axises of direction that the player can move the Wiimotes as well as rotational movement.
I’m not sure if I will be able to implement this into the game, but later this year, Nintendo is coming out with the Wii Motion Plus. This is a device that plugs into the bottom of the Wiimote and more accurately interprets movement made by the player. As it stands now, the Wiimote does not offer true 1!1 movement, however, with the Wii Motion Plus, 1:1 will be possible. Obviously this could help me in interpreting movements by the player, but I’m not sure if I’ll be able to implement this as there is no release date for the device other than sometime this year.
What I’m not sure about as of now is how this technology would be used in the game. Perhaps it could just be a sandbox game where you are put in a certain open environment and there are objects around that you can interact with. Maybe I could simulate drawing with this, so that you could pick up a piece of paper and a pencil and “draw” (you would see the virtual hand drawing rather than just lines appearing on the paper). I could base this around some sort of puzzle that must be solved.
I think what I really like about this idea is the immersion aspect of it. With the use of the controls and the fact that the player can see “their own” hands in the game, I think this brings the player into the game more than usual. I don’t know if this will come up, but I’d also like to implement a system that allows the player to see themselves if they look into a reflective surface. Usually in games, if the player looks into a reflective surface, such as a mirror, the modeled character is seen in the reflection. Instead of doing this, I’d like to use some sort of camera that looks at the player and feeds the video into the game in real-time. So, say someone were to play this on my laptop (it has a built in iSight). The iSight would be recording video that would be fed into the game. If the player looked into a mirror, they would not see a rendered model, but rather see themselves in real life via the iSight. Perhaps I could also implement some sort of chroma keyer in order to get rid of the background environment (real life) that the player is in and put in the background of the virtual environment.
Concept
The concept behind this project is to recreate human movement in a game scenario, focusing on the movement of the arms, hands, and fingers of an individual. In order to do this, I am planning on using two Wii remotes as game controllers. One remote will be held in each hand. The remotes will correspond to the movements of the in-game arms and hands through the use of rotation, motion-sensing, and IR sensing.
This will be a 3D-modeled game in a semi-confined environment (in a room; size has yet to be decided). As of now, the style of the visuals is planned to be realistic, however it is not set in stone and may change throughout the project development.
In addition to moving the character’s upper limbs, the player will be able to move the character around this virtual environment.
Controls
As of now, there are two planned stages of movement: Free Movement and Held Movement. Free Movement would be the normal movement of the in-game limbs as the player moves the character around the space. In this mode, the player will be able to move the arms of the character (again through rotation, motion-sensing, and IR sensing). Held Movement will be the item-specific movement of the limbs after the player has picked up an in-game object. For example, if the player were to pick up a virtual NES controller, the movements and button presses of the remotes will more specifically correspond to the fingers rather than the previous control over the entirety of the arms.
Transition from Free Movement to Held Movement
The player begins in Free Movement. In order to enter into Held Movement, the player will press the A and B buttons on the Wii remote. Each hand is controlled independently, so one hand can be in Free Movement while the other is in Held Movement.
Held Movement Specific Controls
Held Movement, while being primarily the same, will differ slightly depending on what object the player is holding in-game. Following the example given above, if the player picks up a virtual NES controller, Held Movement will be entered. An NES controller is primarily controlled with the thumb of each hand. Because of this, either the rotation or IR of the Wii remotes will be used to move the corresponding thumb (it will be decided later which control scheme works better). Moving the Wii remotes in this fashion will move the thumbs in a two-dimensional plane hovering over the NES buttons. In order to make the thumb press down, the player will press the A button on the Wii remote. Depending on whether the thumb is currently over a button, the thumb could either press down the button or press down on the controller, missing the button. In order to release the NES controller (exiting Held Movement) and return to Free Movement, the player will press the A and B buttons on the Wii remote simultaneously. Again, this can be done separately with each hand if so desired.
Character Movement
This area is still under development. I realized that the player is already using both hands to control the virtual arms. In addition to this every function of the Wii remote is being used for this as well, so there are no functions available to control character movement around the virtual space. I have thought about implementing the Wii Balance Board to solve this problem. The Balance Board is able to sense the weight distribution of a person standing on it. So, for example, if the person is leaning to the left, the Balance Board detects this. Through this detection of body movement, the in-game character could be controlled. However, as is tradition now, there are two ways to move a character –directional movement and rotational movement (these are controlled with the dual-joystick setup, or, in the case of computer games, the mouse and the directional/WASD keys). The problem is that the Balance Board could only be used for one of these controls, not both. So this method could only control the way the character turned OR the way the character walked.
There is a head-tracking technology available for the Wii and its remotes. This technique uses IR sensing. With this, it is feasible to control the rotational movement of the character in addition to the Balance Board which wold control the directional movement. This would be an ideal situation, but I am not sure if it is realistic for this particular project.
Again, these are ideas, and this section is still under development.
Additional Ideas
An idea that may or may not be implemented into the game is the use of a webcam which feeds video directly into the game. If the player moves the character in such a way so as a reflective object is seen on-screen, the object will not reflect the in-game character’s 3D model, but will instead “reflect” the video being received from the computer’s webcam. This webcam will be facing the player while he/she is playing. Thusly, the video will be of the player in real life; this will be what is reflected in the reflective object. This is to suggest that the player him/herself is the character in this virtual environment rather than a fictitious 3D character.
Progress Report and Extraneous Notes
3/17/09
- began working on 3d hands in maya
3/26/09
- rotation works (simple C# console output)
- X and Y AccelRAW data states make sense
- seem to vary from 100-160
- rest state is 130
- not sure what Z does yet… (don’t think i’ll need it)
- X and Y AccelRAW data states make sense
- rotation will be used for rotation of the wrist and arm
3/31/09
- built simple arm and hand for use in testing uniWii and the results i found last week
- applied wiimote script packaged with uniWii to arm
- able to control arm through tilt/accelerometer in wiimote
- pitch and roll/X-axis and Z-axis rotation
- able to control arm through tilt/accelerometer in wiimote
- applied wiimote script packaged with uniWii to arm
- made a script that would allow suspension of arm movement in return for hand-only movement when the A button was pressed
- hand moved around same pivot point as the arm, so is looked odd
4/2/09
- looked into using two wiimotes
- couldn’t really find anything
- tried to connect two just to see what would happen
- both connected perfectly, no extra work involved
- applied working method to two arms/hands
- operated with two wiimotes
4/7/09
- began to look into operation via IR position rather than accelerometers
- began reading through the uniWii/wiimote code to understand what was going on
- realized where the rotations were being made in the code, but wasn’t certain as to the specifics
- did some research on the methods/variables used around the piece of code
- got the gist of how the code worked
- tried to implement IR into the rotation code
- no luck
- code was getting a little complicated so i started a new scene with just a cube and worked on trying to move the cube with IR
- began reading through the uniWii/wiimote code to understand what was going on
4/14/09
- according to the code output, i got the IR to work, but i was seeing no visible sign of it working
- after much research and trial and error, i realized that the measurements being returned were between -1 and +1
- thusly, i WAS rotating, just by very small amounts
- after much research and trial and error, i realized that the measurements being returned were between -1 and +1
- created a separate pivot point for the hand
- hand now rotated in a more realistic fashion
4/16/09
- worked on getting the arms to not rotate so many times when the cursor went on/off screen
- realized that, while i was multiplying the IR by 100 (because the RAW measurements were between -1 and +1), the RAW measurement for being off screen was -100
- so rotation while the cursor was on screen was working fine, but as soon as the cursor went off screen, i was rotating the arms 10,000 degrees
- worked on making use of a variable to stop this over-rotation
- worked on making use of a variable that would return the rotation to 0 is the cursor went off screen
- so rotation while the cursor was on screen was working fine, but as soon as the cursor went off screen, i was rotating the arms 10,000 degrees
4/21/09
- managed to get unity pro trial via email with unity staff
- got it working on my laptop
- began working on project on laptop
- had a lot of trouble getting wiimotes to connect to laptop
- when they did connect, most of the time, the IR functionality did not work
- went through a lot of trouble shooting to try to get this working
- nothing ended up working
- realized i would not be able to use my laptop for unity work
- when they did connect, most of the time, the IR functionality did not work
4/23/09
- worked on different models in maya for possible use with hands in unity (piano keyboard, arcade button and joystick, tv remote, tv/tv cabinet, etc.)
- continued working on 3d hand model
4/24/09
- only able to pick up left wiimote with either hand
- began working on picking up either wiimote with left hand
4/25/09
- lab was closed
- worked on models some in maya
- figured i could do recursion with duplicates of what i already had
- make a hole in the tv where the screen would be, and just place the duplicates behind it
- warp these duplicates according to perspective to make them look correct
- ended up being REALLY huge and REALLY far out despite them looking small
- warp these duplicates according to perspective to make them look correct
- planned on testing this next time i’m in the lab
- make a hole in the tv where the screen would be, and just place the duplicates behind it
4/26/09
- able to pick up either wiimote with either hand
- however, very often both wiimotes would occupy one hand
- as soon as a wiimote touched a rigid body (and B was held on a wiimote), it would automatically go to the hand holding/pressing B
- worked on solving this problem all day
- resulted in nothing but me being confused
4/27/09
- continued working on only being able to hold one wiimote in one hand
- tried many different scripts, mixing variables, commenting out code, etc.
- tried using global variables from a static class
- kind of worked, but when wiimotes were held in both hands, one would not stay kinematic –gravity would instantly affect it, and resulted in not being to hold it
- some more tinkering
- eventually got it to work by using very specific else if statements
- continued working on recursion
- planned to duplicate what’s seen in front of the camera about five times (initial estimate) and move it off screen
- (different from what i had already done)
- each of the duplicates would have a camera that would output to a texture which the previous duplicate’s tv would display
- tv1 would display output from camera2, tv2 would display output from camera3, etc
- continue until recursions could no longer be seen/distinguished
- after much time put into this process, i realized that, because i was duplicating these objects, i couldnt have the cameras outputting to different textures, nor could the tvs display different things
- each camera would output to the same texture, and each tv would display the same thing
- effectively only using two of the duplicates going back and forth rather than using all of them as i had expected
- tried to make “different” scenes in maya
- same scenes, just different named files so i wouldnt be duplicating
- this worked fine, but the game took a massive dive in frame rate
- about 2-3 fps
- same scenes, just different named files so i wouldnt be duplicating
- because of this, decided against using multiple “scenes,” cameras, textures, etc.
- went back to using two cameras with one “scene”
- planned to duplicate what’s seen in front of the camera about five times (initial estimate) and move it off screen
4/28/09
- began working on main screen
- wanted to use the logo i made along with the hand that i had modeled
- rigged the hand in maya and positioned it to match the drawing
- used the wiimote .obj file i had and positioned it to match the drawing
- created rings and balls and positioned them to match the drawing
- created motion paths for balls to move around the rings
- played around with different materials for the objects in the scene
- decided on white black and white lamberts with toon outlines on the balls
- when transfered from my laptop to the classroom computer, the rigged hand mesh resulted in some very messed up geometry
- went back to my laptop and deleted history on hand mesh
- this resulted in a loss of animation of the hand (because i had animated the skeleton)
- fortunately, the mesh kept the pose in which it was rigged, so i simply animated it as the skeleton was animated
- unity did not like the motion paths or the outlines on the balls
- went back into maya to remove the toon effects and hand key every frame of the balls’ paths
- after this, unity did not have a problem with this scene
- import and animation in unity worked fine
- looped animation
- wanted to use the logo i made along with the hand that i had modeled
- during the main screen, i wanted the wiimotes to be used as mice inputs in order to through around some ragdolls or rigid bodies before the actual game
- kind of like a preloader
- looked at dragRigidBody script to see if i could simply replace the mouseDown event with a button press event on the wiimotes
- after some research and a few experiments, i realized that it was too much work, and i would have to basically redo everything i had done for the main game in order for this to work
- decided against ragdoll/rigidbody preloading actions
- continued to finish steps for main screen
- after some research and a few experiments, i realized that it was too much work, and i would have to basically redo everything i had done for the main game in order for this to work
- main screens purpose was to sync wiimotes before game started as well as have cool opening design
- went into photoshop to create text prompts for users to connect and sync wiimotes to game
- placed these prompts onto planes in maya
- originally tried to animate transparency of planes in maya so that they would have a slight flashing animation
- unity did not translate the transparency animation
- then tried to place text around cylinders so that the text would orbit around the hand like the rings
- animated the half-cylinders to rotate
- unity did not like this animation either
- instead of animating where the objects were placed in unity, the objects were moved to different positions while animating (only while animating)
- this position could not be moved
- decided to just use static planes for text prompts
- originally tried to animate transparency of planes in maya so that they would have a slight flashing animation
- began to write script for execution of prompts
- as user synced wiimotes/pressed buttons, prompts would (dis)appear from the camera view
- last prompt/button press loads the game scene
- worked on some final tweaks (removed displayed info from game scene, fixed main screen cursors to say “left” and “right,” took a last look over code)
- added two audio files to project
- one for main screen, and one for game scene
- added script in game scene that returns to main screen if either wiimote disconnects
- built game for final testing
- game somehow (and thankfully) managed to work on my laptop despite it refusing to do so as of late
- built game as OSX universal, windows .exe, and web player
- used game logo as application icon for the three versions
- DONE!
Links To Game
Mac OSX .app Windows .exe Web player
- Note – The web player may not work. I tried it earlier, and I think the problem is the bluetooth. If I can get it to work, I’ll definitely update it.
- Note – The Windows version may have missing prompts in the Main Menu (sometimes they appear, sometimes they don’t; seems dependent on the computer…)
- If you have any trouble with the game, please refer to the instructions
Added Tuesday, February 21st, 2012 @ 9:23 PM
Jump City was the first project for my game engines class junior year. It was also the first game I made in Unity. Actually, it might have been the first game I made ever. It was definitely the first 3D game I created.
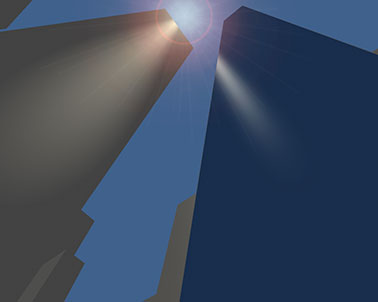
The goal of the project was to make a game from a “navigable space.” As a navigable space, the “object” of the game is to make your way to the top of the building. Once there, you are trapped which leaves you with two options: you can stay on the roof and eventually quit the game, or you can jump off the edge of the building, “killing” the character and start your suicidal journey over again.
Everything in the game was modeled and coded by me.
Click the “PLAY” image down below to play the game. Use WASD (or the arrow keys) to move, space to jump, and the mouse to look around.
NOTE: You need Unity Web Player installed in order to play.
Added Tuesday, February 21st, 2012 @ 9:21 PM
This was one of the two projects that I decided to redo for my new media sculpture class. After the final project had been completed, the teacher allowed us the chance to redo/re-present any of the pieces we did earlier in the semester. I don’t remember getting particularly bad grades on the original Zelda Head and Sound Sculpture, but I wanted to try to make them closer to what I intended them to be originally. Along with that, I had gotten some interesting ideas from the critiques for each of the projects that I wanted to try to work in.
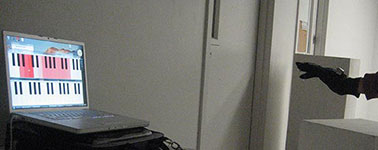
For this project, I took the original Sound Sculpture I had made and it easier to use. I also incorporated the infrared light glove I made for the Wiimote Control Car into the piece. This meant that instead of holding the Wii remote and pointing it at a sensor bar, like one did in the original piece, one would move one’s hand (with the glove on) around on a horizontal plane (forwards, backwards, left, right, etc.) to play music. Also, I simplified the programming side of the piece. Rather than using a C# program to produce the sound, I used a Flash app to make the sound. I created two flashes, one 29-key keyboard and a 30-key keyboard. The first keyboard goes from C1 to E3, and the second keyboard goes from F3 to Bb5. Onscreen, I arranged the second keyboard on the top of the screen (since it has higher notes) and the first keyboard on the bottom of the screen (since it has lower notes). The reason I made two keyboards instead of one was simply so that the keys would be bigger and easier to see. If I had put all of those keys on one keyboard (and had the whole keyboard fit on my screen), the keys would have been too small to see. In addition to the two Flash keyboards, I was still using the C# program to control the computer mouse with the Wiimote and IR lights from the glove.
The Wiimote and glove idea was the same as it was in Wiimote Control Car. The user wears the glove on his or her hand and holds it above the Wiimote which stands on the ground, face up. Imagine a plus sign (or a 2D grid, or even a D-pad). If the user moves his or her hand left or right above the plus sign’s middle line (+), the top keyboard (higher octaves) is played. The further left the user’s hand, the lower the notes that are played. The further right the user’s hand, the higher the notes that are played. If the user moves moves his or her hand left or right below the plus sign’s middle line (+), the bottom keyboard (lower octaves) is played. Again, moving the hand left and right plays lower and higher notes respectively.
Added Tuesday, February 21st, 2012 @ 9:12 PM
This was one of the two projects that I decided to redo for my new media sculpture class. After the final project had been completed, the teacher allowed us the chance to redo/re-present any of the pieces we did earlier in the semester. I don’t remember getting particularly bad grades on the original Zelda Head and Sound Sculpture, but I wanted to try to make them closer to what I intended them to be originally. Along with that, I had gotten some interesting ideas from the critiques for each of the projects that I wanted to try to work in.
For this project, I sculpted a generic-looking head out of clay (I believe this was the first time I ever really sculpted something out of clay). I then spray painted it white. This time, instead of using my wire Zelda head and projecting Zelda’s face onto the head, I set up my camera for people to stand in front of, and their faces were projected onto the clay head I made. The projection conformed much better to the shape of this head than it did for the Zelda head.
Added Tuesday, February 21st, 2012 @ 9:07 PM
If I remember correctly, this project could be whatever we wanted, of course as long as it was some kind of “new media” sculpture. I wanted to try to use the Wii remote again. My original proposal describes my idea:
I’m not entirely sure what I’m going to do for this project, but I’m thinking I will try and use the Wii remote control again. Going through some sites for research during my last project, I came about a cool demo where a guy used the Wii remote to track the movement of his fingers (up to four of them). I think I’d like to do something with this technology. Today I got an idea that could use this. Earlier this semester, I was looking into controlling a remote controlled car with the Wii remote. The way I envisioned it was that I would use the Wii remote’s tilt sensors to determine the direction and movement of the car (tilt forward would go forward, tilt back would drive in reverse, tilting to the sides would turn the wheels). The technology to do this is definitely available; it just requires buying certain parts to assemble. However, instead of using tilt to determine the car movement, I thought that one could use hand/finger gestures to control the car. So moving one’s fingers closer or farther away from the Wii remote would determine the forward/backward movement/speed of the car, while moving one’s fingers left or right would control the car’s wheels.
The final product, much to my delight, was pretty much exactly what my proposal described. I had researched using a bluetooth device (the Wiimote) for an R/C vehicle, but the process and pieces I would need would be far too expensive. Luckily, I found a toy car online that one can control wirelessly from a computer. This was perfect! I had already used the Wiimote to control my computer in previous projects, so this was a great start.
The car works by plugging its charging station to a computer via USB. It comes with a small program that allows the user to move the car forwards and backwards as well as steer left and right. I tried to gain access to this program with a C# program of mine, but I could not get it to work. Soon I realized that I was making it harder than it needed to be. The car’s remote control program works by either using the arrow keys on the computer’s keyboard or by pressing the onscreen buttons with the computer’s mouse. All I had to do was have the Wiimote mimic the computer’s keyboard/mouse!
I remember that I ended up mimicking the mouse movements rather than keyboard button presses. I think it was because mimicking keyboard strokes didn’t work for whatever reason… But anyway, I wrote a C# program that placed the computer’s cursor on certain places on the screen and mimicked pressing the left mouse button depending on where the Wiimote was in relation to the Wii sensor bar. So basically, depending on the placement of the Wiimote, the computer’s cursor would click one of the remote control program’s directional buttons, causing the car to move.
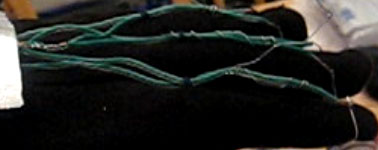
I then built a glove that would serve as the user’s means of controlling the car. I attached infrared lights to the bottom of the fingertips of the glove, two small batteries on the top of the glove (to power the lights), and a piece of tape on top of the batteries to hold them down (and make the glove look for technological :P). I then placed the Wiimote face up on a flat surface, such as a table or the ground, and held the finished glove above it. The Wiimote works by detecting infrared light, normally from the Wii sensor bar; however, in this case, it was detecting the infrared lights from my glove. Also, it’s normally the Wiimote that moves around while the IR lights are stationary, but I was doing the opposite (which works just as well).
The car is controlled holding the glove above the Wiimote (wearing it on one’s hand, of course) and moving one’s hand around on a horizontal plane. Imagine a plus sign (or a 2D grid, or even a D-pad). Moving one’s hand forward (to the top point on the +) moves the car forward. Moving one’s hand backwards (to the bottom point on the +) moves the car backwards. Moving one’s hand to either side (to the left/right point on the +) will turn the wheels. Turning can be combined with moving forwards or backwards by moving one’s hand to “diagonal” positions (again, picture the +). If one’s hand is directly above the Wiimote, that is the neutral/stationary position, and the car does not move.
My friend, Will, came to visit for one weekend, and he helped me test it all out. That’s who’s in the images and videos (not me :P).
Added Tuesday, February 21st, 2012 @ 9:04 PM
The assignment for this project was to create a “sound sculpture.” I wanted to create a kind of digital instrument that could be played with no (or minimal) physical contact, preferably using one’s hands. Here is my original proposal:
I am thinking about making a kind of “music glove.” What I would like to do is make a glove that plays different pitches depending on what you do. The way I envision this is that there will be small buttons in the joints of the glove so that when one bend’s his/her fingers, the buttons will press. Each button will correspond to a pitch in the musical scale. There are eight notes in an octave, and thirteen chromatic notes in an octave; right now I am not sure if I will choose to use just normal pitches or chromatic ones (either way it’s an odd number because there are only ten available fingers). The glove will also have one or more infrared lights on it. This (these) will be used in correspondence with a Wii remote control. The Wii remote reads IR lights and determines where it (the remote) is in relation to the lights; however, it can also be used the other way to track the IR lights with a stationary Wii remote. I plan to code this so that, depending on the Y-value (horizontal position) of the glove will change the octave the glove is able to play from. For example, if one has the glove down low, the buttons on the glove will play C1-C2; if the user moves the glove a bit higher, C2-C3 will correspond to the buttons, and so on.
Originally, I intended to use some flex sensors for an Arduino and build those into the proposed glove. I would then hook a speaker up to the Arduino that would produce the pitches determined by the location of the glove and the flex sensors being activated. Unfortunately, I don’t remember the exact details, the flex sensors did not work the way I thought they would, but I continued playing with the Arduino and getting it to produce sound. I eventually was able to produce sounds with the Arduino, in fact I programmed “Happy Birthday to You” and “Still Alive” (from Portal) which was amusing, but by that time, I realized that I was not going to be able to use the Arduino as originally intended. I then shifted my focus to using only the Wiimote to create a musical instrument.
I made a C# program for this purpose. By using the Wiimote, users could start by choosing a “continuous” keyboard or a “step” keyboard (musical keyboard, not computer keyboard). After choosing, a keyboard would appear onscreen, allowing the user to play musical notes depending on the horizontal placement and movement of the Wiimote. Imagine a keyboard in front of you. The lower notes are on the left, and the higher notes are on the right. The program works the same way. The further to the left you hold the Wiimote, the lower the notes. The further to the right you hold the Wiimote, the higher the notes. The “continuous” keyboard plays notes whenever the user moves the Wiimote (as if one is holding one’s finger down and moving it across the keys). The “step” keyboard only plays notes whenever the user presses A on the Wiimote.
Because I had spent so much time on it (and it was my original plan), I also showed my progress with the Arduino during the crit. Later in the semester, I remade this project, and it turned out to be much closer to what I had originally intended.
Added 2/21/12 @ 9:02 PM
This project was supposed to be a “new” sculpture. I believe we were supposed to take a previous art piece, preferably a sculpture, and make it into a new sculpture. Originally, I wanted to use my “planes in space” computer and add some electronic elements to it to make it less analog and more digital. This is further described in my original proposal for this project:
As of now, I am thinking about taking a “home-made computer” I made in my sculpture class last year and adding things to it. What it is now is a box made of poster board shaped like a computer tower. It has a hole in the front on the top of the box. Through that hole, one can see pre-made “screens” (images of computer programs pasted to sheets of poster board). One can also change which screen is visible to imitate the change of programs on a computer. So right now, it is completely manual. I’d like to make this a little more automatic and electronic to more resemble a computer. So perhaps adding some LEDs to it or putting a small screen in the hole, putting a small fan in the back, having a “power cord” come out the back, and maybe I can find a way to use a mouse or mouse-like device to control what is seen on the screen.
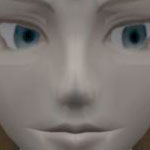
Eventually, I decided to reuse a wire sculpture of Princess Zelda’s head (from Twilight Princess). Side note: both the “planes in space” computer and the Zelda head were made in my sculpture class the previous year. Holograms and three-dimensional projections is something I’ve always been interested in, so that’s where I got the idea for what to do with Zelda’s head—I wanted to project Zelda’s face onto the wire head, essentially creating a three-dimensional projection.
I contemplated numerous different ways to go about doing this. One thing was certain: I needed to cover the wire with some kind of material. Otherwise, the projection would “pass through” the head and display on whatever was behind the head. However, I didn’t want to ruin or lose the wire head (since I did such a good job on it :D), so something like clay and paper-mâché weren’t viable options. After much consideration, I decided to use shrink wrap which I would spray paint white (it was originally transparent). As you can see in the images below, the shrink wrap didn’t conform to the shape of the head quite as well as I had hoped, but it wasn’t too bad.
In addition to all of this, I took the Princess Zelda model from the game and animated her face in Maya. I then imported the animations into flash to make the animations interactive. Depending on where you click on Zelda’s face, she responds with different reactions.
Ultimately, the interactive Zelda face was projected onto the shrink wrap-covered Zelda head. During the crit, we also removed the Zelda head sculpture and tried projecting the interactive face on students’ faces. This became the impetus for the remade version of this project.
Added 2/21/12 @ 8:59 PM
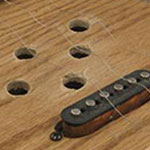
This was just a quick group-based project to get us to know one another. I don’t remember what exactly the assignment was, but I think it may have been something like “make a sculpture out of found objects.” The members of my group and I made a makeshift electric guitar-ish instrument. The wood used to construct the body and the side panels was, I believe, left over wood we found in the art department’s wood shop; the “strings” were springs from an old printer that we stretched out; the pickup was from one of the member’s old, broken electric guitar; and we used an 1/8″ stereo cord from an old pair of headphones. Because we had the stereo cord, we were able to plug the instrument into a computer, for example, and amplify the sound coming from it. BOOM! Makeshift electric guitar!
Added 2/21/12 @ 8:56 PM
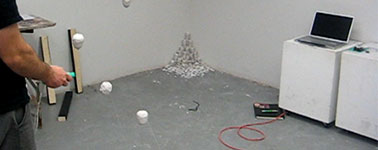
For this project, we were supposed to create some kind of “lo-fi” digital image or video in the form of an installation. I decided to gather a bunch of digital cameras, place them sequentially around the crit space, point them at the previous camera’s flip out screen, and project the resulting video on the crit room’s wall. So I had one camera looking at part of the room. Another camera a few feet away was looking at the first camera’s flip out screen. Another camera was looking at the second camera’s flip out screen, etc. until I had the last camera hooked up to the projector which displayed the very degraded “original” video from the first camera.
Thanks to Patrick LeMieux for being the subject of the documentation video.
Here is the original project assignment:
PROJECT FOUR
Image based installation based on projection and exploring lo-fi digital imaging aesthetics
CONCEPTUAL OBJECTIVE
In this last project you will take the image off of the screen and put it into 3 dimensional spaces either with projections or hanging an accumulation of printed images. We will also explore the idea of lo-fi using devices like old camcorders and digital cameras, analog cameras, VCRs, scanners etc. as a source for image collection. Part of the lure of digital is its promise of perfection. In this brief time we will look at the “mistakes” of digital and use those as a potential source of inspiration for making work
You will work alone on this project. The content or theme of the project must have something to do with projection and/or degradation of an image.
TECHNICAL OBJECTIVES
- Video projection
- Alternative input devices
- Installation
FORMAT
You can use iMovie, FCP, and Photoshop and Flash to bring together your images for this project. The images will be projected in a space of your choice. Another option would be to print out images and then hang them in such a way so as to create a space. The idea is not to hang a set of pictures, but to create and installation/immersive space. If anyone has questions on what I am asking for, please do not hesitate to contact me. You will turn in two DVDs, a data DVD (with an .mov file) with your process work and an authored DVD that works on DVD player. You must also document your final piece with either video or still image.
IMAGE COLLECTION
You will generate the content/images for this project from found sources such as television, old VCR tapes, video collection, images that you find on the web, etc. You may also take images or video and experiment with removing digital information as part of the process of this project.
Think about or ask yourself the following as preparation or during this process:
- Think about “digital” versus analog ways of both making and looking images. What do you perceive as the difference? Does each process have its own aesthetic?
- Think about the experiences that you have had with art that involves video and projection. How were those experiences different than just watching a movie at the theater or on television?
- What is my content and how does it relate to theme of projection and degradation?
- What kinds of research or preparation do I need to do for the content I have chosen?
- What materials can I experiment with to convey my content?
- What equipment will I use or experiment with to both capture and project my images?
- How is the formal part of this project connected to the conceptual theme?
- What software will be the best tool for the content of my project
- How can I use the technology to enhance the setting that I wish to create?
- How will I organize or arrange my materials in a three dimensional space?
INTEGRATION—PUTTING IT ALL TOGETHER
This is not a one take affair. You have a set of challenges that you will need to work with. The first is deciding upon the content or idea of what you will make. The next is finding the equipment and time for experimentation. The last and in some ways also the first is the construction of a space. How do want people to interact with the images in the space? What do you want them to take home with them? How will your audience be transformed by the experience? After you have shot/collected all of your footage, WATCH IT AS A PROJECTION. You may need to come into the lab and actually play it on the instructor station looking at it projected on the screen. Play with idea of images in space. You may need to use the little space outside of Jack’s office to try out your ideas before you actually construct the piece. Be sure that the visual framework that you are creating best contextualizes your content. Like everything you have done this far, play with this idea.
Lastly and this is part of why we are in school, show and discuss you ideas with one another. This is what we do during critique.
Added 2/21/12 @ 8:54 PM
Essentially for this project, we were supposed to create a short narrative movie relating to microscopy. We were also required to shoot the movie using a microscope (the teacher had a number of “toy” microscopes for us to use).
I hand drew my movie and captured every frame (which was, of course, a separate hand drawn image) under the microscope. At the beginning of my movie, we see a small dot. The microscope then zooms in until the dot is distinguishable as an atom. However, upon zooming in even further, it appears the the atom is actually a planet with orbiting rings. We continue to zoom on one of the planet’s continents, the continent’s city, the city’s block, the block’s building, and a room in the building where we see a man sitting down looking through a microscope. Looking through the microscope ourselves we see an amoeba about to devour a smaller organism. Zooming once again, we see the smaller organism is actually a space ship traveling through (what it perceives to be) space. Focusing on one of the stars beyond the ship, we find a small solar system. After zooming in to the sun of this solar system, we finally begin to zoom out. However, upon zooming out, we realize that the sun of the solar system is actually the pupil of a man’s eye. Continuing to zoom out, this man’s head is lost to the cosmos which we soon find is actually an electron orbiting an atom. The video is meant to be looped indefinitely.
Here is the original project assignment:
PROJECT THREE
Making a microscope movie
CONCEPTUAL OBJECTIVE
Visiting an electron microscopy facility (I am still working on this), watching Fantastic Voyage and Being John Malkovich has made us think about the invisible made visible, scale and size. This project uses Intel Play Microscopes as devices for developing and creating a narrative that is formally based upon and has content related to the infinitesimal. Visualizing something that is not seen, but imagined.
You will work alone. I have four microscopes and am bidding on a few more on Ebay. The themes/content of the project must be related to scale and size. The project must have a narrative quality that we can discern and the images must initially be created using the microscope. There are many ways to do this; you can animate frame-by-frame or stage a video.
TECHNICAL OBJECTIVES
- Small format video
- Alternative input devices
- DVD authoring review
- Image research
- Digital color
FORMAT
You can use iMovie, FCP, and Photoshop and Flash to bring together your images for this project. If anyone has questions on what I am asking for, please do not hesitate to contact me. You will turn in two DVDs, a data DVD (with an .mov file) with your process work and an authored DVD that works on DVD player. Your movie must be at least 2 minutes but no longer than 4.
IMAGE COLLECTION
You will generate the content/images for this project from the microscope. They may be minimally processed in whatever editing program you use. Minimal processing means color correction, contrast, sharpness. You can not go back and edit every frame in PS or add extra elements using PS or AE.
Think about or ask yourself the following as preparation or during this process:
- How does scale change one’s perspective of an image?
- What is my content and does it relate to the theme of scale?
- What kinds of research or preparation do I need to do for the content I have chosen?
- What materials can I experiment with to convey my content?
- What type of preparation ie storyboard or some other organizational method will I use to set up my shots?
- How is the formal part of this project connected to the conceptual theme?
- What software will be the best tool for the content of my project
- How can I use the technology to enhance the setting that I wish to create?
- How will I organize my shots in to a cohesive sequence of images?
INTEGRATION—PUTTING IT ALL TOGETHER
This is not a one take affair. You may have to shoot a fair amount of video. This project is much more about preparation and setting up the shot as opposed to major manipulation after the fact. Think of it as documenting a performance rather than an editing exercise. After you have shot all of your footage, WATCH IT. Play around with their sequence and the speed. Be sure that the visual framework that you are creating best contextualizes your content. Like everything you have done this far, play with this idea.
Lastly and this is part of why we are in school, show and discuss you ideas with one another. This is what we do during critique.
Added 2/21/12 @ 8:53 PM
The idea behind this project was that we were supposed to come up with a fictional scientifically-based event or invention and “find and collect” information on it to present to the class. So really, we had to come up with the fictional event/invention then create fictional documentation about it.
I found information on this really neat device called the Dream Catchr. In short, the Dream Catchr records dreams just like a VCR/DVR records TV shows. After the dream has been recorded, it can be played back and watched (while the person is awake) on the device’s screen. Very cool. You can find the documentation I collected below.
Here is the original project assignment:
Original Project Assignment
PROJECT TWO
Creating an archive/collection/scrapbook based upon a scientific fiction compiling and compositing scanned images
CONCEPTUAL OBJECTIVE
In this project you will create a digital documentation of a scrapbook, archive or collection that is based upon a fiction whose content is related to science. The fiction is created by you, but may be based on “real” or probable event or experiment. Potential ideas could include positing yourself in a past event or history and documenting your participation and that of others or it could also be an experiment that you design. You could transform an accepted history changing the events so as to precipitate an alternative outcome. As part of this process, you will create a narrative and a virtual framework where your narrative will be realized. Part of the idea here is that you are playing with the idea of how the literature and images of science are many times accepted as a truth. You will collect images and textures from a variety of sources other than the internet that support your fiction. As part of the development of this project, you will research the context of your fiction as part of your process using the library resources.
TECHNICAL OBJECTIVES
- Intermediate scanning processes
- Photoshop compositing
- Image research
- Digital color
FORMAT
The format of this project of this project is very open. You potentially may use a variety of formats to document your fiction. The fiction can be displayed as a website, a pdf document, or even a video of images (a la Ken Burns). The format must be digital and screen based. Think about the content you want to portray and pick the format that best suits your ideas. If any one has questions on what I am asking for, please do not hesitate to contact me.
IMAGE COLLECTION
- You will generate the content/images for this project initially from scanned materials and images gathered from the “real” world versus the internet. The scanned materials should not just be restricted to paper images. They could be object and textures. You may use the different kinds of scanning equipment or use the scanner in a non-traditional fashion to accomplish your goals.
- Think about or ask yourself the following as preparation or during this process:
- What is the fiction/experiment I want to propagate?
- Where am I or what is my perspective with respect to the events I want to portray in my fiction?
- What is the best vehicle or framework in which to place my story?
- What do I need to look up or research to make my fiction believable or plausible?
- What kinds of visuals will I use to create a situation where the audience or participant can suspend his or her disbelief?
- What can I do with technically with Photoshop to create and adjust my images to create a context for my images?
- How can I use the technology to enhance the setting that I wish to create?
- How will I organize my materials into a cohesive body of images that represent my fiction?
Scanning
As part of this project, you will expand your expertise and knowledge of scanning. You will manipulate both the scanner settings as well as Photoshop to create the best practice with respect to digitizing images and objects. Scanning becomes something more than just placing a piece of paper on a scanner and hitting the auto button. Also too think about ways of using your scanner that are atypical. We will talk more about this in class.
Compositing Images
In this project you will get a lot of practice in compositing images. As a class we will focus on how the edges of images interact with the edges of backgrounds as well as other images. Also, you integrate what you learned about filters in the previous project to create textures that contextualize and breathe life into your document.
INTEGRATION—PUTTING IT ALL TOGETHER
After you have collected all of your images, LOOK at them. Play around with their sequence and layout. Look each set of images separately. Look at them mixed up together. You may want to print them out and lay them out on the floor before you organize them digitally. You may want to collage and composite them physically with scissors and tape before you start working digitally. You may even want to print more than one copy of an image as part of this process. Sometimes first touching and physically manipulating images even if you intend to present them on screen can be very helpful in organizing your thoughts. In addition to blogging, you may want to make a process book or box/container of the physical materials that you are collecting.
Look up the terms, archive, history, fiction, and scrapbook? You may want to research the origins of archives, collections and scrapbooks as point of departure for your project. Think about the different ways people display and collection of materials to portray or convince you of a history or the way an event happened.
What can you do to make the viewer believe your version of history of your fiction?
After you have figured out the layout and order of the images, put them into whatever software you will use to make your sequence. Be sure that the visual framework that you are creating best contextualizes your content. Like everything you have done this far, play with this idea.
Lastly and this is part of why we are in school, show and discuss you ideas with one another. This is what we do during critique.


