Added Tuesday, July 30th, 2013 @ 11:38 PM
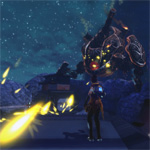
Here are some effects that I created for Grapple over the course of a few weeks. The video includes:
- Animated Grapple Logo
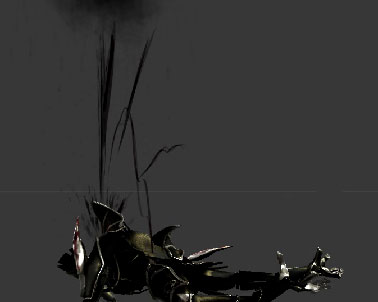
- Machina Death/Oil Spurt (a very detailed look into how I made this effect)
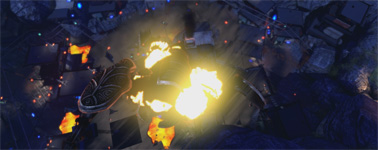
- Fire Bomb/Molten Metal
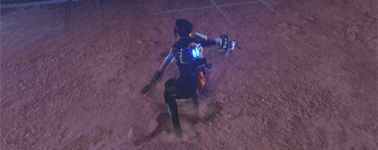
- Footprints
- Animated Sprite Sheet Material
The particles and shaders were created in UDK’s Cascade and material editors while the animated logo was rendered from a 3D scene in Maya and composited in After Effects.
Original music: Tom Mundy
Amina model: Nisa Martinez and Karen McCarthy
Original logo concept, building models, and Destrozar model: Karen McCarthy
Destrozar rig and animations: Robert Campbell
Added Friday, July 26th, 2013 @ 12:00 AM
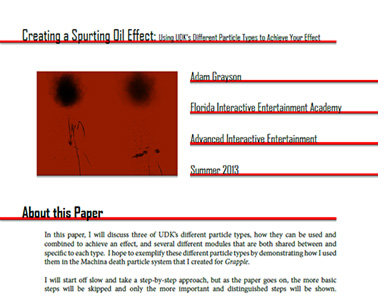
Late in our third semester at FIEA, the art students were expected to create a thesis based on something or some technique we wanted to or had learned while at FIEA. The teachers described it as an “innovation presentation.” Most of us used the opportunity to document and explain how we had overcome some crazy obstacle for our capstone games. Many of us chose to write it almost as a tutorial for future cohorts to use when they started their capstone games. Personally, I had been doing a lot of effects and particle work in UDK around that time, so I decided to describe one of the more challenging particles I had been creating–the Machina death/oil particle. I had gone through a ton of iteration on this particle, it had taken a long time to get it to look right, and it used some more advanced (I felt) particle work that I wished I had known when I first started using UDK, so it the perfect candidate to write about.
The paper goes over what my original task and goal was, some of my iteration, some (hopefully) helpful methods, different kinds of UDK particles, and, of course, the final product. You can read it here! If some of the videos don’t work in your browser, you can download the .pdf, and they should work.
Added Thursday, July 25th, 2013 @ 12:01 AM
One of the last effects we needed for the game was one for when the Destrozar furiously hits the ground during the final cutscene. Something that big hitting the ground that hard would make quite a lot of dirt fly around… Because I was working on five or six particles at the time, and we were running out of time, Anthony Fariello (on team Warp Derby) was kind enough to let us use his explosion particle (which are the explosions in the cutscene).
Added Thursday, July 25th, 2013 @ 12:00 AM
This is a particle effect I made to use for when characters where landing on the ground after a jump. In the video, you can see it emit at Amina’s feet. Unfortunately, we did not have time to put it in the game. It’s “in game” in the video simply because I hooked a few things up in UDK, but were it to have actually been in the final build, the particles would have only appeared when characters landed on sand (not on metal or roofs, for example).
Added Thursday, July 18th, 2013 @ 12:00 AM
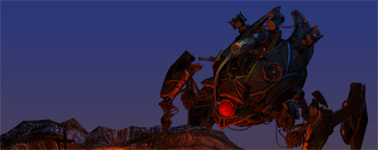
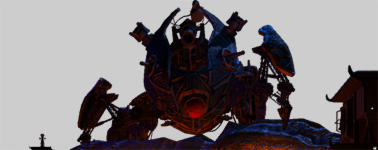
Each year, FIEA gives its students plaques for their Capstone games. The designs for the plaque are created by members on the teams. While we ended up going for a different design, here are my concepts for the Grapple plaque. The one with Destrozar’s eye on the top half was designed to have the disc on the top of the plaque which no other past plaques had done (the disc has been on the bottom half of the design in the past), so I thought it might be interesting to try out a design that did that. All of the designs were put together and rendered with Maya.
While I did pose the characters and put the scenes together, I did not create the models.
Amina model: Nisa Martinez and Karen McCarthy
Destrozar and building models: Karen McCarthy
Machina and mountain model: James Diab
Amina, Destrozar, and Machina rig: Robert Campbell
Added Thursday, July 18th, 2013 @ 12:00 AM
In the past, FIEA has given students discs and game boxes for their Capstone games. The disc and box designs were created by the members of each team. This year, however, they changed things up a bit. Instead of giving us physical copies of the games, we were instead to design a 42″x27″ poster for our games. We ended up going with a different design, but here is my work for a couple of concepts I made.
Amina model: Nisa Martinez and Karen McCarthy
Destrozar and building models: Karen McCarthy
Machina and mountain model: James Diab
Amina, Destrozar, and Machina rig: Robert Campbell
Added 7/10/13 @ 9:43 AM
For this piece, I set out do my best to get a RealFlow fluid mesh into UDK. The main enemy in Grapple has an ability to shoot a napalm “cannonball,” and my intention was to make it act like a liquid when it hit the ground–to have it splash and deform almost like a water droplet, only fire-y and dangerous. Immediately after, and most likely during the splash, fire particles would also start emitting from where the cannon hit, but the biggest shape, at least upon impact, would be this fireball exploding like a liquid.
Because the gorgeous looking meshes generated from RealFlow would have several thousands (very often more than 10,000) vertices and would move with very fine detail, I wanted to capture as much of that detail as I could in the most game-efficient way. I thought it would be neat and very doable (from a scripting standpoint) to just bake joints to every vertex, but that would be by no means a viable option for UDK. I then wondered if I could still track all of the vertices but instead do it through the object’s shader. Not only would it be very doable to move that many vertices in the shader, but it would likely be many times faster/more efficient while still giving me an incredible amount of detail to the object’s “animation.”
One of the challenges came in feeding the shader the complicated curves of the vertices’ animation. I thought about storing each data point (time, x-value, y-value, z-value) for each vertex in something like an .xml file, but feeding that amount of data in to the shader every draw call would put enormous stress on the system, especially with everything else happening on screen (and potentially this shader being applied to more than one on-screen object at once). What if I could instead create a function that represented the animation curves? The function would only have to be read once, and I could simply feed the shader in time in order to get the xyz’s different values. Moreover, after discussing the possibility with professors and fellow students, I decided that I could store these formulas in a texture to be read at run-time by the GPU which would be faster than reading an .xml file by the CPU (which would have to pass the data to the GPU anyway).
The shader is incomplete as of now, but the above video shows and explains the scripts and method behind driving the shader’s “animation.”
Added 7/3/13 @ 12:00 AM
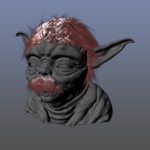
One day in modeling class, we went over Maya’s hair tools. THIS IS WHAT RESULTED!
The Yoda model is, funnily enough, by one of our tech art teachers, Barak Moshe from when he was at FIEA.
Added 6/27/13 @ 12:00 AM
At one point during the game’s development, we were planning on having the Destrozar shoot bullets from its smaller side turrets. I made a bullet texture that I used for both the bullets and the particle that emitted when the bullets hit a surface. The bullets themselves were just three or four intersecting planes with the material assigned to them.
It was pretty cool having Destrozar relentlessly shoot at you, but we ended up not including the feature in the final build. That said, the functionality was still in the game, so I turned it back on for the sake of the video. I also made it so the shooting was continuous and endless, because why not? 😛
Added 6/20/13 @ 12:01 AM
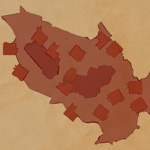
One of my Grapple tasks was to work on the minimap. Originally, I was simply going to outline the borders of the mountains and buildings, but I quickly realized there could be some problems with that. There were many areas of higher elevation that covered navigable ground below them. The most noticeable example was a large platform far above that covered the ground below it–ground that Amina could (and would) easily and commonly walk on. If I used this platform as part of the map’s border, and Amina were to walk below it, it would look like she were breaching the bounds of the level. Likewise, the game’s multistory buildings had the same issue with their multiple roofs. So the question became, “How can I design the map so that Amina never hits an ‘invisible wall’ or breaches a wall?”
One idea I had was to outline different borders at different elevations. Then perhaps in game, all of the elevation layers would be visible in the minimap with those closest to Amina’s height being the most opaque and the ones farthest from her height being the most transparent. The opacity of the different borders would constantly change as Amina grappled through the level. This way, all of the borders would always be visible on the map, but only the most relevant borders (those at Amina’s height) would be emphasized.
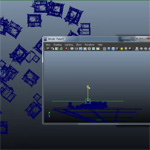
So how could I accomplish this? I had the level in Maya, so I needed to adjust the near/far clip planes of the top camera. That, however, quickly proved to be a hassle that I didn’t want to deal with… at least not by guessing and checking the clip plane values. It was taking far too long. If only there were a way to visualize the clip planes’ positions, then I’d at least be able to see how far off my guesses were… I couldn’t find a way, so I made one myself (if there is a native way in Maya, then I feel silly >_>).
I created two planes and tied their Y positions to the values of the camera’s clip planes with simple expressions. Now I was not only able to visualize the clip planes, but I was also able to move them directly (versus typing in a value, hitting enter, typing in another value, hitting enter, etc.). This setup made the whole process infinitely easier and faster. I could simply sandwich the area that I wanted to outline between the two planes, and I would get just the lines I needed without the outlines of objects above or below that area covering the lines I wanted.
With this setup I rendered out the outlines of different elevations in the level and then drew over them in Photoshop to give the map a hand drawn look.
Unfortunately due to time constraints, we were not able to try out the map transitioning between elevations. Regardless, this method did help in creating the final map, plus it was a neat and effective solution (I thought :P) to a problem that I had not only encountered in this task but also in the past (and likely in the future).
Added 6/20/13 @ 12:00 AM
Here is the work I did on Grapple’s minimap and its icons. The minimap took more work than I was expecting, so I made a neat little setup in Maya to help with that. The icons were more straight forward–one for Amina, one for power lanterns, one for objectives, one for a lantern thief holding a lantern, and one for a lantern thief not holding a lantern. These were all mock-up icons, so they are not the final ones used in the game.


