Added Monday, October 1st, 2012 @ 12:00 AM
Class:
PIE 1 Art- Modeling
Assignment:
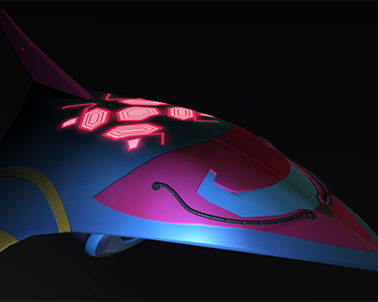
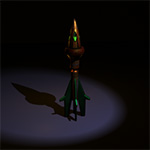
Use Maya to finish texturing and lighting the Metroid ship redesign that you’ve modeled and UVed in the previous assignments. You may use one color map, one specular map, one emissive map, and one normal map. Each map can be up to 2048×2048.
Description:
I based the design and color scheme of the ship off of both Zero Suit Samus and Samus’ Fusion Suit. The scratches near the tail are intended to be from Ridley. Also, there are certain parts of the ship that really remind me of Feraligatr (unintentionally) :P. Maybe the Metroid character artists were big on Pokémon at the time…
Tris: 8,298 (I THINK the tri limit was increased, but I don’t remember…)
Maps: Color (2048×2048), Incandescence (2048×2048), Normal (2048×2048)
Added Thursday, September 27th, 2012 @ 12:00 AM
Class:
PIE 1 Art- Animation
Assignment:
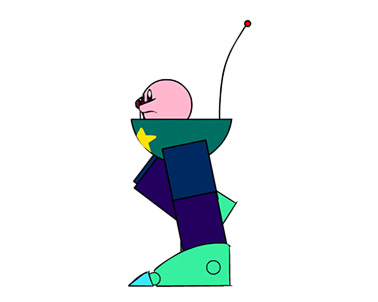
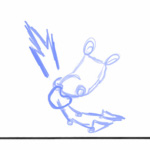
Create two walk cycles in Flash using Flash’s bones. One animation should be a stationary walk cycle, and the other should move across the screen. These animations should be more detailed and complete than those in the previous assignment.
Description:
For this assignment, I wanted to use Kirby again, but I didn’t want to just recreate my PAP animation from the side, so I gave him giant robot legs.
Added Thursday, September 27th, 2012 @ 12:00 AM
Class:
PIE 1 Art- Concept Art
Assignment:
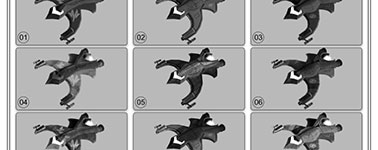
Use your one of your top three winning Metroid ship redesigns from the previous assignment and create nine different value range studies for it. Try stick with the ship that most looks like it would fit in the Metroid universe (from your top three). Use the value ranges to create designs on the ship as well.
Votes of 18 students from previous assignment (design – number of votes):
Design 01 – 3
Design 02 – 1
Design 03 – 2
Design 04 – 0
Design 05 – 1
Design 06 – 2
Design 07 – 3 (I voted for this one)
Design 08 – 1
Design 09 – 5
Description:
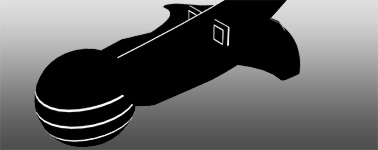
Design 09 from the previous assignment won. Since the previous assignment only called for a black and white silhouette, I hadn’t completely modeled the ship. Also, a lot of the shapes were “off.” What I mean by that is that the ship looked more or less correct from the angle that I rendered the image, but some of the shapes were distorted or floating off in space and whatnot, so I had to actually finish modeling the ship itself first. I then took the silhouette render (from the previous assignment) and the shaded render (seen below) into Photoshop and started assigning values and making designs out of them.
Finally, we printed these out (the last image below) and hung them up. Then we picked our one favorite redesign from each person’s work. The votes were tallied up, and whichever redesign got the most votes was the one we were to work on in the next assignment (in the case of a tie, the artist chose which one he/she wanted to work on). Which one do you like the best? 🙂
Added Monday, September 24th, 2012 @ 12:00 AM
Class:
PIE 1 Art- Modeling
Assignment:
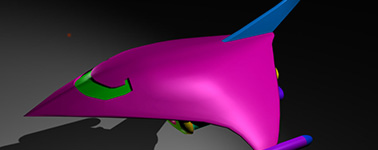
Use Maya to finish UVs on the ship you modeled in the previous assignment. Create a basic texture in Photoshop to apply to the ship just to show that the UVs are complete.
Description:
The assignment pretty much says it all. I UVed the ship from the previous assignment. I then created a basic texture of solid color masks in Photoshop and applied it to the model.
Tris: 6,730
Added Thursday, September 20th, 2012 @ 12:00 AM
Class:
PIE 1 Art- Concept Art
Assignment:
Use the shapes provided to you in Maya to create silhouettes for nine Metroid ship variants. You may distort the shapes however you like. You are also free to create your own shapes if you choose.
Description:
As the assignment says, we were given a bunch of shapes in a Maya file that would could use to help build our ships. The idea was to use a 3D program to ultimately create a 2D image as opposed to using a 2D program to create a 2D image like we did for the previous three assignments. The ships were build in Maya and then arranged on the final page in Photoshop.
Finally, we printed these out (the last image below) and hung them up. Then we picked our one favorite redesign from each person’s work. The votes were tallied up, and whichever redesign got the most votes was the one we were to work on in the next assignment (in the case of a tie, the artist chose which one he/she wanted to work on). Which one do you like the best? 🙂
Added Wednesday, September 19th, 2012 @ 12:00 AM
Class:
PIE 1 Art- Animation
Assignment:
Create two walk cycles in Flash. For both, take the PAP walk cycle from our previous assignment and recreate it in Flash using Flash’s bones tool. One walk cycle should move across the screen while the other should be stationary.
Description:
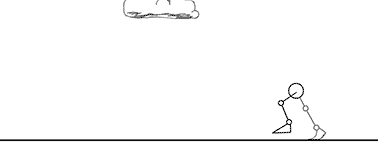
One of two animations for this assignment. We exported our PAP animations out as frames, imported those frames into Flash, traced them (and possibly improved them), and created a Flash armature (set of bones) from them. We were to first animate the cycle so that it didn’t move across the screen. This way, we could get the loop to look right. Next, we were to translate this animation across the screen. Of course, we had to make it look right. Legs do not simply float across the land (though mine does a little floating here and there >_>)!
Added 9/17/12 @ 12:00 AM
Class:
PIE 1 Art- Modeling
Assignment:
Pick one of the Metroid ship redesigns from the 13 provided and recreate it in 3D in Maya. For this first step, just focus on the model, do not worry about textures or lighting or anything else. Use between 6,000 and 7,000 tris.
Description:
I box modeled the ship in parts, very roughly matching the shape. As you can see, I had several revisions all in the same scene as I tweaked the shape and the number of tris I was using.
The “revisions” mentioned in the image descriptions refer to the numbered save files I have for each model. For example, I have seven different files, each being more complete than the last, with the seventh being the final model that I turned in.
Tris: 5,522
Added 9/14/12 @ 12:00 AM
Class:
PIE 1 Art- Concept Art
Assignment:
Use the values from your winning design from the previous assignment to color and finish your item/prop redesign.
Votes of 18 students from previous assignment (design – number of votes):
Design 01 – 0
Design 02 – 0
Design 03 – 0
Design 04 – 0
Design 05 – 0
Design 06 – 0
Design 07 – 0
Design 08 – 0
Design 09 – 7
Design 10 – 2
Design 11 – 8
Design 12 – 1
(I forget which one I voted for >_>)
Description:
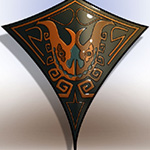
I based the final colors off of the winning value design from the previous assignment (design 11) and the colors from Ganondorf’s cloak (Wind Waker). I kept the design in Illustrator for the base colors, then I pulled it into Photoshop for some tweaking and the lighting.
Added 9/12/12 @ 12:00 AM
Class:
PIE 1 Art- Animation
Assignment:
Animate two walk cycles in PAP. Focus on the bottom half of the body rather than the whole thing. The first walk cycle should simply move across the screen. The second animation should be a “gag” walk cycle.
Description:
The first of two animations for this assignment. It’s a pair of stick figure legs walking across the screen.
Added 9/11/12 @ 12:00 AM
Class:
Rapid Prototype Production (RPP) 1
Game:
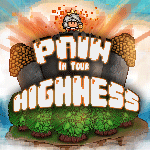
Pain in Your Highness
Assignment:
You will be split into teams of 4-5 consisting of producers, programmers, and artists. In two weeks, create a “fun” game using Flash as your game engine.
Description:
Pain in Your Highness is a fast-paced puzzle game, similar games like Tetris, Bejeweled, and Meteos. Players must stop a never-ending onslaught of enemy soldiers as they relentlessly come to attack the queen and her castle and steal her delicious royal pie.
Waves of enemies come from the top of the screen and move down toward the bottom of the screen (the castle). They increase in the number of enemies and the rate at which they move toward the bottom of the screen as time goes on.
Players click on enemies in order to kill them. If all enemies of the same color are killed in one row, all of the remaining enemies on that row will instantly die as well. For example, if a row has two red enemies, a yellow enemy, and a blue enemy, the player can kill only the two red enemies, and the remaining yellow and blue enemies will automatically die.
When players destroy a row by only clicking enemies of the same color, they increase their combo. Increasing the combo makes power-up items available to players. These power-up items can be used at any time to help wipe out lots of enemies at once.
The game is over when one or more enemies reach the castle walls.
Credits:
Artists – Jen Melnick and Adam Grayson
Producer – Shawn Delouche
Programmers – Matt Burton and Brian Widman
Added 9/10/12 @ 12:00 AM
Class:
PIE 1 Art- Modeling
Assignment:
Finish texturing the Metroid missile redesign you’ve been working on. Make sure to add lighting to the Maya scene as well.
Description:
Using the basic texture I blocked out on the UVs from the previous assignment, I tried to match Samus’ color scheme as well as the lighting from that concept art in the background of the below image.
These are in-progress screenshots, renders of the final model, and the model’s final texture (just a color texture).
Tris: 2954
Maps: Color (1024×1024)


