Added Monday, November 12th, 2012 @ 12:00 AM
Class:
PIE 1 Art- Modeling
Assignment:
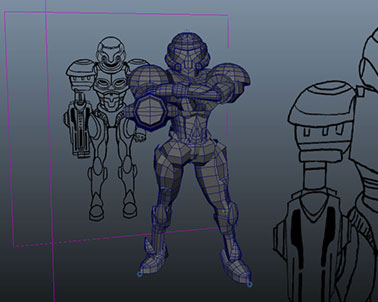
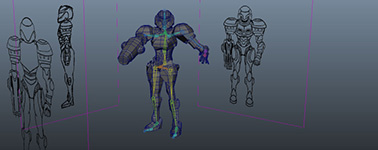
Continue working on your Samus model from the previous assignment. This is still a low res model you’re making. Again, when you’re done modeling, bind the model to a skeleton and make sure everything moves correctly. Use between 4,000 and 5,000 tris.
Description:
As you can see, I added some more detail to the model while at the same time getting rid of some unnecessary geometry (such as all those edges in the hand). I did a lot of work on the entire body, but most noticeable is probably the head, arm/hand, and the chest piece.
The “revisions” mentioned in the image descriptions refer to the numbered save files I have for each model. For example, I have eight different files, each being more complete than the last, with the eighth being the final model that I turned in.
Tris: 4,926
Added Monday, November 12th, 2012 @ 12:00 AM
Class:
Rapid Prototype Production (RPP) 1
Game:
Antivirus
Assignment:
You will be split into teams of 4-5 consisting of producers, programmers, and artists. In two weeks, create a social and/or mobile game. You can develop for Facebook and/or a mobile device.
Description:
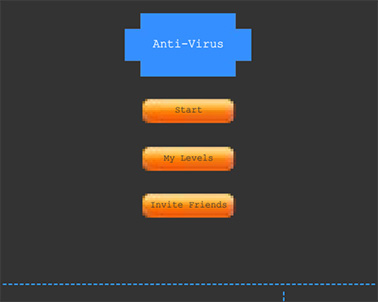
Antivirus is a social, top down space shooter designed for playing on Facebook (it is no longer on Facebook). Players take control of an antivirus program that’s out to rid the digital world of viruses and malware. Players move around a confined environment shooting enemy programs while dodging attacks from said programs and trying to protect their own bits from becoming infected. Bits act like the player’s lives. Normally, bits follow the player around the field, but when they or the player gets hit by an enemy attack, they become infected, stop following the player, and begin shooting at him/her along with the enemies. Healthy bits randomly appear around the field, and can be picked up by the player before they’re hit by an enemy attack (and become infected). When the player runs out of healthy bits, the next shot to hit the player kills him/her and ends the game.
Enemies appear in waves. A certain number of enemies appear each wave, and when players eliminate the enemies from one wave, the next wave begins. There are three waves per level and five levels before the game is complete. Even if players don’t reach the end of the game, their scores are recorded.
On the social side of the game, players can could compare their high scores to those of their friends. The game also includes a level builder of sorts where players can designate how hard each wave of their “custom game” is. These custom games can then be sent to friends for them to play. While one may think that creating harder waves are the way to go, keep in mind that the harder the wave, the more points a player gets when playing/beating the wave. The scores of these custom games were also recorded and compared to friends’.
Credits:
Artist – Adam Grayson
Producers – Ben Crocker and Paul Weiler
Programmer – Laura Barton
Added Friday, November 9th, 2012 @ 12:00 AM
Class:
PIE 1 Art- Life Drawing
Description:
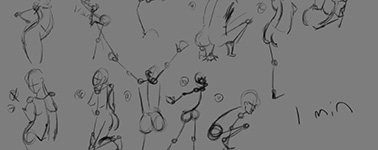
These are all of my drawings from our life drawing class, held every Friday. The course was heavy on anatomy. Each week we would focus on a different part of the body. Often we were instructed to pay attention to not the exterior curves of the body but rather the interior bones and muscles that created the exterior shape. The beginning of class was usually dedicated to techniques on how to draw the part(s) of the body we were focusing on that week while the rest of the class was series of timed drawings, again focusing on that week’s part(s) of the body.
All of these drawings are in Photoshop using a drawing tablet.
Added Friday, November 9th, 2012 @ 12:00 AM
Class:
PIE 1 Art- Concept Art
Assignment:
Use one of your top three winning character redesigns from the previous assignment and create eight variations on that design. You may use your the winning redesign from the previous assignment as one of the eight for this assignment. Do not worry about color yet, but do use both varying value ranges and shading in your redesigns.
Votes of 17 students from previous assignment (design – number of votes):
Design 01 – 2
Design 02 – 1
Design 03 – 5
Design 04 – 2
Design 05 – 3
Design 06 – 0
Design 07 – 0
Design 08 – 4 (I voted for this one)
Description:
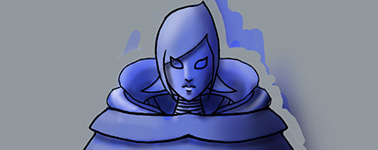
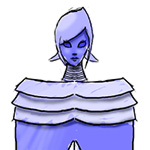
Since design 03 was the winning redesign from the previous assignment, I used that as a base. Personally, I really liked 08 and 05, so I worked aspects of those into some of these redesigns. I was trying to go for a slightly older looking Fi with a different outfit than the original. Obviously I wanted her to be recognizable as Fi, so I kept some of the original outfit’s pieces like the jewel, her long, ribbon-like sleeves, and the criss-cross pattern on her legs, some of which I moved around. I also tried to introduce other aspects of the Master Sword and its sheath into her outfit.
I drew the redesigns in Photoshop and arranged them on a page. We printed our redesigns out (the last image below) and hung them up. Then we picked our one favorite redesign from each person’s work. The votes were tallied up, and whichever redesign got the most votes was the one we were to work on in the next assignment (in the case of a tie, the artist chose which one he/she wanted to work on). Which one do you like the best? 🙂
Added Thursday, November 8th, 2012 @ 12:00 AM
Class:
PIE 1 Art- Animation
Assignment:
Create/Complete a set of controllers for the model we’ve been using in previous assignments. Movement of the model should be driven only from the controllers, NOT the joints. The rig should include forward kinematic controllers for everything but the legs which should be inverse kinematic controllers.
Take data from one of our motion capture shoots and bring it into Motion Builder. Apply one or more of the mocap motions to our model (in Motion Builder).
Create a MEL autorigging script that takes an .fbx exported from Motion Builder and applies our rig to it. The script should also remove keyframes from the joints of the .fbx and instead apply the keyframes to the rig’s controllers. This will allow the imported data to be driven solely by the controllers.
Description:
The video (Maya playblast) is just part of this assignment. At this point, my autorigging script was not complete, so that’s why there aren’t any controllers in the video. What this video DOES show is the Ganondorf model I’d been using applied to a mocap take. I applied the motion to the model in Motion Builder, and this video shows the result once I imported the skeleton and model back into Maya. Note that this is before any modifications from me. This is just the unedited data from the mocap shoot.
The images document the rig section of this assignment. The circles and arrows are FK controls, the boxes by the feet are IK controls, the L and R in front of the knees are pole vector controls, and the arrow in the back moves the entire model as a whole.
Fun fact: I was the actor for the mocap shoot 😀
Added Monday, November 5th, 2012 @ 12:00 AM
Class:
PIE 1 Art- Modeling
Assignment:
Choose one of the Samus redesigns from the eight provided, create a front, back, and side view from the original perspective, and use those as reference to create a low res, rough draft model in Maya. Stay between 3,000 and 4,000 tris. After you’re done modeling, make a skeleton to ensure that there are no glaring errors with the geometry and how it moves.
Description:
As you can see, I chose design 7. I thought that design looked the most like Samus–like that could be a design you’d see in the game–and because the suit looked more slender/feminine and was very different from all of the other bulkier, pointier options. Plus I thought the holes in the front were pretty cool.
I took the original perspective view created by our teacher, and I made the front, back, and side views in Photoshop. I then set those up as image planes in Maya and used them as reference while I modeled. After that, I built a quick skeleton to make sure all of the movement looked relatively believable (there were some issues there, but those were fixed in the next few assignments 😉 ).
The “revisions” mentioned in the image descriptions refer to the numbered save files I have for each model. For example, I have nine different files, each being more complete than the last, with the ninth being the final model that I turned in.
Tris: 3,916
Added 11/1/12 @ 12:00 AM
Class:
PIE 1 Art- Concept Art
Assignment:
Choose a character from the Mario, Metroid, or Zelda universe and redesign him or her. Create eight different thumbnails with varying value ranges. While these are redesigns, all eight designs must be recognizable as the original character.
Description:
Seeing as how I’m a diehard Nintendo fanboy, I had a hard time deciding which character to redesign. Seeing as how I’m a dieharder Zelda fanboy, I had an even harder time deciding which Zelda character to do (once I decided to choose a Zelda character :P). In the end, it was between Skyward Sword’s Zelda and Fi. As you can see, I chose Fi.
I drew the thumbnails in Photoshop and arranged them on a page. We printed our redesigns out (the last image below) and hung them up. Then we picked our three favorite redesigns from each person’s work. The votes were tallied up, and whichever redesigns got the most votes were the ones we could choose to work on in the next assignment (in the case of a tie, the artist chose which one he/she wanted to work on). Which ones do you like the best? 🙂
Added 10/30/12 @ 12:00 AM
Class:
PIE 1 Art- Modeling
Assignment:
Improve the Metroid environment from the previous three assignments.
Description:
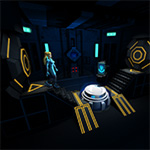
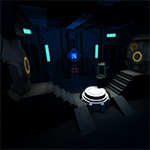
I did pretty much everything to this–I reworked the model, tweaked the lighting, added to/changed the textures, and because of that, I had to rework some UVs. Though because getting the ambient occlusion bake to work correctly was such a pain in the previous assignment, I tried my hardest not to change the UVs too much.
As far as modeling, I went back in to remove lots of unnecessary geometry, I smoothed out some noticeably polygonal pieces (such as the middle circular pad), and I added a lot of small grooves and whatnot.
I did a little bit of rework with the lighting. Most obvious is the lighting coming from the central circular pad. I also added quite a bit of incandescence to the texture. At the teacher’s request, I removed the blast mark from the doors and I changed the screen on the main monitor in the middle. As you can see, I started to play around with (again) using sprites from the game, but the teacher asked me to remove those as well (I don’t remember exactly why).
Finally, I added Brawl’s Zero Suit Samus model into the environment (note, I did NOT make the model, but I rigged and posed it).
The “revisions” mentioned in the image descriptions refer to the numbered save files I have for each model. For example, I have 11 different files, each being more complete than the last, with the 11th being the final model that I turned in.
Tris: 15,312 (the tri limit was raised, but I don’t remember what to… 17,000 maybe?)
Maps: Color (2048×2048), Ambient Occlusion (2048×2048), Incandescence (2048×2048), Normal (2048×2048)
Added 10/26/12 @ 12:00 AM
Class:
PIE 1 Art- Concept Art
Assignment:
Take your 3D environment from the previous assignment and paint over in any method you’d like to achieve a “painterly” style.
Description:
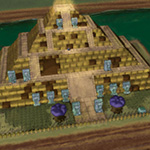
The final assignment in our “painterly” environment project. I took the Maya renders from the previous assignment, combined them, and went to town on them in Photoshop. Unsatisfied with just painting the Pyramid, I also added the environment around the building (all in Photoshop, not in Maya).
Added 10/23/12 @ 12:00 AM
Class:
PIE 1 Art- Modeling
Assignment:
Use Maya to finish modeling, UVing, and texturing the Metroid environment from the previous two assignments. You may use a color map, normal map, specular map, emissive map, and ambient occlusion map. Each map can be up to 2048×2048. Be sure to use Maya’s layered textures for the color and AO maps.
Description:
Originally, I wanted to use the 32-bit textures straight from the game (Metroid Fusion), but I quickly found that making them look right in the environment was just not going to be possible (at least not without a tremendous amount of rework). You’ll notice that I did recreate and use some of the 32-bit textures such as the computer screen (which doesn’t show up in software renders for some reason…) and the vertical/horizontal lights on the back wall. Then I used the whole screenshot as a texture for the diamond/octagon screen in the background. Other than that though, I tried to stay relatively close to the source material.
The “revisions” mentioned in the image descriptions refer to the numbered save files I have for each model. For example, I have seven different files, each being more complete than the last, with the seventh being the final model that I turned in.
Tris: 12,970
Maps: Color (2048×2048), Ambient Occlusion (2048×2048), Incandescence (2048×2048), Normal (2048×2048)
Added 10/23/12 @ 12:00 AM
Class:
Rapid Prototype Production (RPP) 1
Game:
Cake Fighter X
Assignment:
You will be split into teams of 4-5 consisting of producers, programmers, and artists. In two weeks, create a game with emergent gameplay.
Description:
In a world with no morals… A world where people are pit against each other for sport… A world where the acquisition of delicious baked goods is the difference between life and death… There is… Cake Fighter X!
Cake Fighter X is an online multiplayer third-person action puzzler with a 3D pixelated art style. Players are dropped into an arena where they must obtain as many slices of cake as possible before time runs out. The player with the most cake at the end wins.
In order to get to the slices of cake, which usually appear in hard to reach locations, players must use different types of blocks to climb, jump, and blast their way to victory. There are four different kinds of blocks…
- Normal blocks – have no special effect or ability
- Bomb blocks – explode, blowing away nearby blocks and players after a few seconds, and then disappear
- Tornado blocks – continually suck in nearby blocks and players for a few seconds and then disappear
- Trampoline blocks – bounce players up very high when jumped on
Players have an inventory of four blocks at a time. Whenever a player uses a block, another random block appears in the empty inventory slot. Once a player chooses a block to use, the character holds onto the block until the player decides to either place it or throw it. Placing a block leaves it floating in midair in front of the player while throwing it tosses it far in front of the player (placed blocks are not affected by gravity, but thrown blocks are). Blocks already in the arena can also be picked up and placed/thrown again. Players can reach the slices of cake using the different types of blocks as platforms to jump off of and/or by using each block’s abilities to help themselves navigate the arena and/or hinder other players.
We never made a web-friendly build of the game, but you can download it here. There’s no installation required. Just unzip the .zip and launch the .exe. Once you get past the title screen (by pressing G), one person can press the “Start Server” button, then all of the other players can press the “Refresh Hosts” button. A third button should pop up listing the game the first player is hosting. Click on that to join. Note that all players must be connected to a local network/the Internet in order to play with others.
This game is played online, so theoretically, if someone is hosting a game halfway across the world, you should be able to play with them 😀
Controls:
- G to start the game at the title screen.
- WASD to move (forward, side step left, backwards, side step right respectively).
- Spacebar to jump.
- Mouse to turn the character/aim the camera.
- Left click to throw a block.
- Right click to place a block in midair. Also picks up blocks that are already in the arena.
- 1,2,3,4 to choose a block to use. 1 will equip the leftmost block while 4 equips the rightmost block.
- Press Alt and F4 together to quit the game.
Credits:
Artist – Adam Grayson
Producer – Eric Elzy
Programmers – Roman Hong and Chris Sosa


