Added Friday, October 19th, 2012 @ 12:00 AM
Class:
PIE 1 Art- Concept Art
Assignment:
Choose one of your two environments from the previous assignment and “take it to the next level.” Like the previous assignment, don’t worry about textures, just focus on improving the model.
Description:
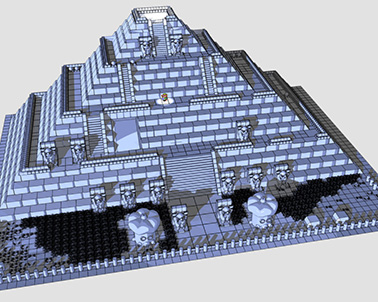
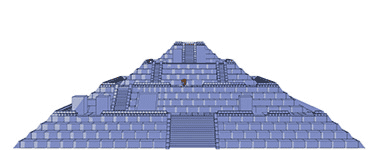
This was the second project in our “painterly” environment assignment. Because I was already working on my Metroid environment in our modeling class, I decided to stick with the Zelda environment for this class. I went back and tweaked a few parts of the Pyramid itself, but most of the work was on the grounds around it. I added the statues, the trees, the different patches of grass, the fence, and the rocks. Again, I equated one pixel in the screenshot to one unit in Maya.
I took the renders from Maya and arranged them on a page in Photoshop. Finally, we printed these out (the last image below) and hung them up.
The “revisions” mentioned in the image descriptions refer to the numbered save files I have for each model. For example, I have five different files, each being more complete than the last, with the fifth being the final model that I used for the final printed image.
Tris: 1,262,848 (without outlines), 3,263,838 (with outlines)
Added Thursday, October 18th, 2012 @ 12:01 AM
Class:
PIE 1 Art- Animation
Assignment:
Create two animations in Maya. One should be a bouncing ball, and the other should be a walk cycle; it should be an improvement from the previous assignment.
Description:
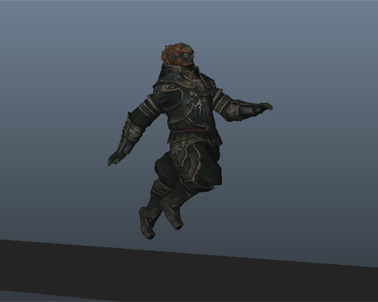
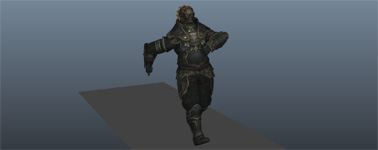
This is one of two animations for this assignment. This is a second walk cycle using the Ganondorf model. This one is a little more… dainty than the previous one.
Added Thursday, October 18th, 2012 @ 12:00 AM
Class:
PIE 1 Art- Animation
Assignment:
Create two animations in Maya. One should be a bouncing ball, and the other should be a walk cycle; it should be an improvement from the previous assignment.
Description:
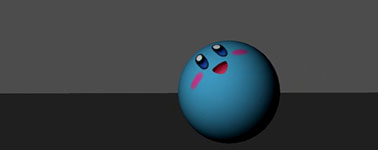
This is one of two animations for this assignment. Again, Kirby seemed appropriate since he is himself pretty… baller… (ha).
Added Tuesday, October 16th, 2012 @ 12:00 AM
Class:
PIE 1 Art- Modeling
Assignment:
Use Maya to UV the environment model from the previous assignment. If you would like to do some more work on the model itself, you may now use up to 15,000 tris. Apply a basic 1024×1024 texture to the environment.
Description:
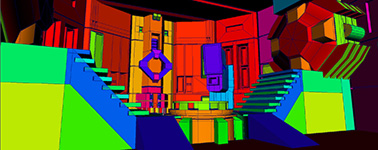
I did a little more work to the model itself including closing off the front of the room. In the original model, there was only a back wall. In this version, there’s a front wall as well. Other than that, I just Uved the whole thing then created a basic texture in Photoshop.
Tris: 12,572
Added Friday, October 12th, 2012 @ 12:00 AM
Class:
PIE 1 Art- Concept Art
Assignment:
Choose two environments from the Mario, Metroid, and/or Zelda universes and use Maya to recreate and model them in 3D. You are encouraged to choose environments from one of the series’ 2D games, but you may choose a 3D environment if you’d like. This is a rough draft model. Get all of the essential shapes there, and don’t worry about textures. When you’re done modeling, apply a three-toned toon shader and outlines to the model.
The purpose of this assignment and the next two is to take one of these two environments, model a 3D base in Maya, then use Photoshop to paint over the shaded render and make a “painterly” style recreation of the environment.
Description:
This was the first step to another three stage project. As described above, this first assignment had us pick two environments from the Mario, Metroid, and/or Zelda universes and model them in 3D. Fortunately, our teacher allowed us to use the Metroid environments from our modeling class for this assignment as well if we liked (which all of us did :P).
I chose to model the Dark World Pyramid from A Link to the Past and reuse my Recharge Station from Metroid Fusion. I did touch up the Recharge Station a little, but the majority of the work was done on the Pyramid. Like I did with the Recharge Station, I modeled the Pyramid by basing one unit in Maya off of one pixel in the screenshot. Because there is some 2D perspective going on in the screenshot, I was worried that things wouldn’t quite fit or that I’d mess up by a unit or two, but fortunately, things fit together surprisingly well!
I took the renders from Maya and arranged them on a page in Photoshop. Finally, we printed these out (the last image below) and hung them up. Then we picked our one favorite redesign from each person’s work. The votes were tallied up, and whichever redesign got the most votes was the one we were to work on in the next assignment (in the case of a tie, the artist chose which one he/she wanted to work on). Which one do you like the best? 🙂
The images for the Recharge Station are the same ones from my “PIE 1 Art, Modeling: 3a – Modular Metroid Environment Model” album.
The “revisions” mentioned in the image descriptions refer to the numbered save files I have for each model. For example, I have five different files for the Pyramid, each being more complete than the last, with the fifth being the final model that I used for the final printed image.
Pyramid Tris: 95,532 (without outlines), 1,083,142 (with outlines)
Recharge Station Tris: 11,096 (without outlines), 1,840,636 (with outlines)
Added Thursday, October 11th, 2012 @ 12:00 AM
Class:
PIE 1 Art- Animation
Assignment:
Animate a walk cycle in Maya using the rigged model from the previous assignment. Be sure to pay attention to exaggerated movement.
Description:
Haters gonna hate.
Added 10/9/12 @ 12:00 AM
Class:
PIE 1 Art- Modeling
Assignment:
Use Maya to recreate one of the two provided environments from Metroid Fusion. The chosen environment should be build using modular set pieces. Use 12,000 tris or less.
Description:
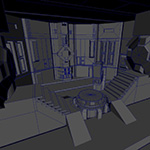
I chose to model the Recharge Station. I got a few screenshots from the game and modeled the environment to pixel perfect accuracy (which was relatively easy since it’s a GBA game). Each pixel in the screenshot is one unit in Maya. This, however, became more difficult once I started modeling objects in the screenshot’s background since there’s perspective and diagonal lines and such. I did my best to match it pixel-for-pixel, and I was surprised at how well everything fit together in the end. Apparently I made some pretty good guesses on measurements 😀
The “revisions” mentioned in the image descriptions refer to the numbered save files I have for each model. For example, I have seven different files, each being more complete than the last, with the seventh being the final model that I turned in.
Tris: 11,716
Added 10/7/12 @ 12:00 AM
The very first round of capstone pitches starts with the five minute pitch where, as the name implies, students have only five minutes to pitch their game idea to the students and teachers. Because time is so limited, students can only present a very, very broad description of the game. In my five minutes, I wanted to communicate my ideas about how gameplay would work in The Network. I described The Network as a free running, first-person platformer. A cyberpunk Mirror’s Edge if you will. I talked about the three main hierarchies of the game’s environments, how one would navigate those environments, gave examples as to what those environments might look like, and gave a brief demo on how I envisioned combat would work.
The game’s world (or in this case worlds) would include the “real world” as well as The Network (a digital world). Players would freely move around the real world. In the real world, there would be “terminals” that allowed access to the digital world known as The Network. The Network would differ from the real world in terms of aesthetic and level design, but would be similar to the real world in that players could freely roam the environment. Scattered throughout The Network would be access to the game’s “levels.” These levels would be linear in that they had a clear start and finish that players would run to, but they would be non-linear in that they would have multiple different paths to get from start to finish. Ideally, certain paths would be easier to progress through but would take longer while other paths would be harder to progress through but would take less time if played correctly. The example I gave to express this notion was how levels in Sonic the Hedgehog often have varying paths to get from the level’s start to its finish (refer to page 3 of the presentation). Higher paths are harder to stay on but lead the player to the finish much quicker than the easier, lower paths.
While the main focus of the game would be the exploration of these environments through free running/parkour, there would also be combat involved. Because the characters of this game were mostly human/machine hybrids, combat would be initiated in the real world but mainly performed in the digital world. If enemies approached the player, he/she could “hack” the enemy, allowing the player to enter the digital mind of the assailant. Then, the player would quickly run through an abstract environment, similar to those described above only shorter and more intense (in terms of platforming). If the player successfully got to the end of the level within a certain amount of time, the hack would be successful, and the character would disable the enemy back in the real world. If the player did not get to the end in time, the enemy would hurt and/or kill the player. In order to not disrupt the constant feeling of flowing movement I wanted the game to possess, players would immediately be thrust into the digital world when a hack was initiated, and the game would start the player off already running. Meanwhile, in the real world, time would effectively be slowed because things in the digital world move much faster than those in the real world (and some such fictional reasons). When the player reached the end of the hacking level or failed to complete it in time, he/she would be immediately thrust back out into the real world and a corresponding animation would follow (dependent on the player’s success).
I’m sure I just went into more depth than I did in the original five minute pitch, but those were the ideas I was trying to convey for the presentation. Fortunately, the idea was popular enough to get voted to go to the next round of pitches. The work for that presentation can be seen here.
If you’re unable to play the videos in the PDF in your web browser, you can 1) download the PDF (which should allow you to view the videos) or 2) watch the videos on YouTube.
Added 10/5/12 @ 12:00 AM
Class:
PIE 1 Art- Concept Art
Assignment:
Finish your Metroid ship redesign based on the winning value range/design from the previous assignment. Include color, lighting, and shading.
Votes of 18 students from previous assignment (design – number of votes):
Design 01 – 0
Design 02 – 0
Design 03 – 3
Design 04 – 0
Design 05 – 5
Design 06 – 1 (I THINK this is the one I voted for…)
Design 07 – 3
Design 08 – 2
Design 09 – 3
Description:
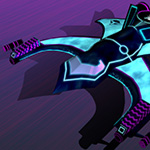
Design 05 from the previous assignment won. I started to color the ship in Photoshop, but I couldn’t get it to look right (particularly the lighting), so I moved over to Maya instead. I tweaked the model of the ship, I UVed it, I made the color and incandescence maps in Photoshop, and lit the scene in Maya. After rendering the result, I put it back into Photoshop and cleaned it up a bit, added the little alternate views on the side, and added the background. Since this was just going to be used as a render, I didn’t worry about fitting all of the UVs on one map. Rather, I split them up so that I could have good resolution for all of the ship’s parts. Though I suppose I could have just made one really big map… Hmm…
Added 10/4/12 @ 12:00 AM
Class:
PIE 1 Art- Animation
Assignment:
Create a skeleton for a model in Maya.
Description:
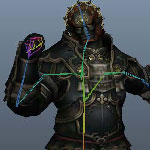
We were given a lowres model to use, but we could use other models if we wanted. Since I have this Ganondorf model that I hadn’t rigged yet, I decided to use him :D. After giving our villain here some bones, I just put him in a simple pose for presentation.
Note: I did NOT create this model (I wish I did…). I did, however, create the skeleton 😛
Added 10/2/12 @ 12:00 AM
Class:
Rapid Prototype Production (RPP) 1
Game:
The Decision
Assignment:
You will be split into teams of 4-5 consisting of producers, programmers, and artists. In two weeks, create a game that tells a story.
Description:
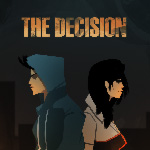
The Decision is a game about an unremarkable young man and his girlfriend who are down on their luck and are running out of money to live on. One day, the girlfriend convinces the young man that they should rob a friend of hers, so they decide to pay him a visit. Because the entrance to the apartment complex is boarded shut, they climb the fire escape on the side of the building, and break the friend’s window. Apparently he isn’t home, but the girlfriend insists that there’s a safe somewhere in the room. After finding the money, the two hear someone else’s footsteps in the apartment. The young man realizes that this “friend” is one of the city’s most infamous drug dealers, Syd! Syd is furious and chases the two out of the apartment, to the building’s rooftop, and across the rooftops of nearby buildings. The girlfriend has had enough! She pulls a gun on Syd and asks the young man what he wants to do. Should they give the money back and let bygones be bygones, or should they just take the money and leave?
Originally, we wanted to have the player make several big decisions throughout the game that would significantly change the story. The biggest decision (the decision that the game’s name refers to) would be the player’s decision at the end of the game to either give up or get away. We had also wanted to tell the story in a non-linear fashion. The game would begin with the last few seconds of the story (chronologically) with the three characters on the rooftop, the girlfriend pointing the gun at Syd, and her asking the young man what he wanted to do. The player would make the decision, and the game would jump back in time to where the story starts (the young man getting a call from his girlfriend in his apartment). The story would progress linearly until the player got to the decision again, at which point, the game would take over, remembering the choice the player made at the beginning of the game, and conclude with a cutscene dependent on the player’s decision. If the player chose to get away, the girlfriend would shoot Syd, and the young man and his girlfriend would get away with the money. If the player chose to give up, the girlfriend would shoot the young man, and Syd and the girlfriend would run away with the money (we had originally intended to more heavily imply a past relationship between Syd and the girlfriend).
We wanted the wording of the choices to be clear enough to convey the moral dilemma of this otherwise innocent young man while at the same time being ambiguous/misleading as to the actual outcome of the decision. If the player were feeling greedy and decided to take the money, we didn’t want the player (or the young man) to expect that the girlfriend would shoot Syd. If the player didn’t feel that what the young man and his girlfriend were doing was the right way to get some extra money and decided to give up, we didn’t want the player (or, again, the young man) to expect that the girlfriend would shoot her boyfriend.
Unfortunately, many of these plans were lost in development, mostly due to time restraints, so neither the story nor the decision are really as strong as we wanted them to be. Regardless, it still came out to be a pretty decent two-week game.
We never made a web-friendly or Mac-friendly build of the game, but for those of you with Windows, you can download the game here. There’s no installation, just unzip the file, and run the .exe.
Controls:
- WASD to move (up, left, down, right respectively)
- E to pickup/drop objects and perform actions
- Spacebar to jump
- Shift (hold) to run
- Press Alt and F4 together to quit the game.
Credits:
Artists – Ryoma Tazi and Adam Grayson
Producers – Arlen Eldridge and Paul Weiler
Programmer – Evan Cookinham


